


EN
19
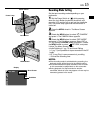
Self-Recording
JOURNALISTIC SHOOTING
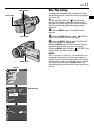
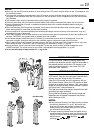
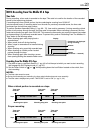
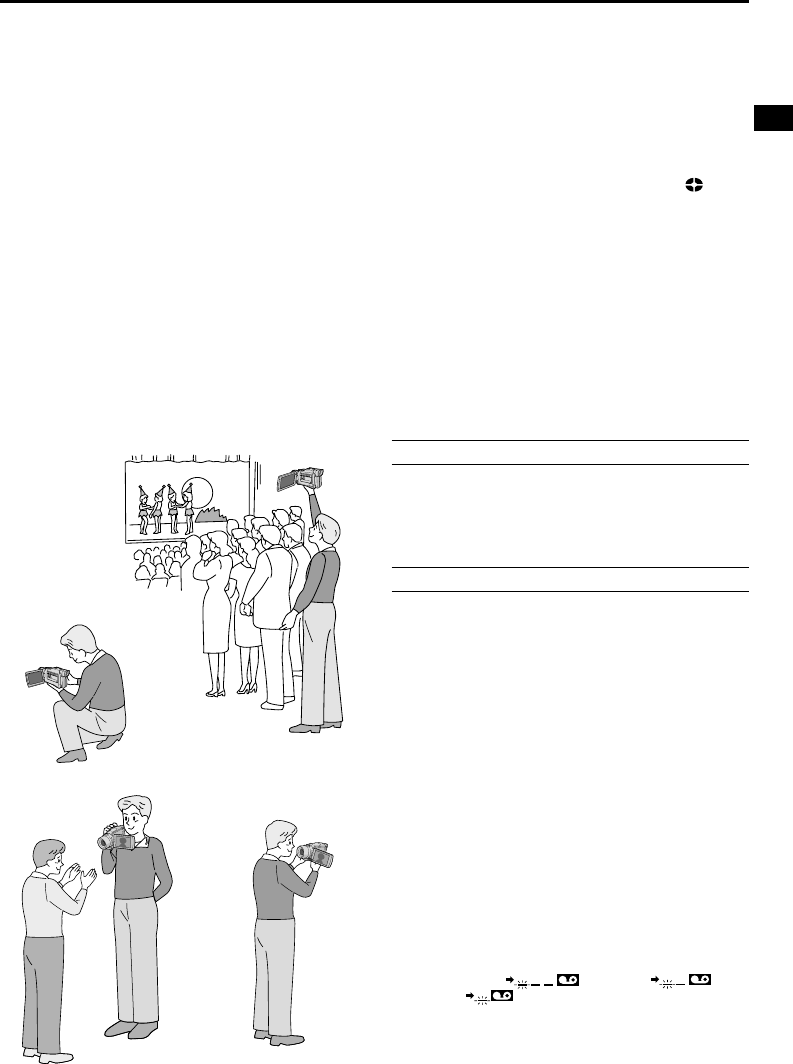
In some situations, different shooting angles may
provide more dramatic results. Hold the camcorder in
the desired position and tilt the LCD monitor in the
most convenient direction. It can rotate 270° (90°
downward, 180° upward).
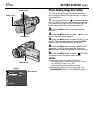
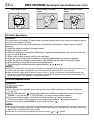
INTERFACE SHOOTING
The person you shoot can view himself/herself in the
LCD monitor, and you can even shoot yourself while
viewing your own image in the LCD monitor.
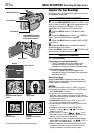
Open the LCD monitor and tilt it upward to 180° so
that it faces forward. When the LCD monitor is tilted
upward to an angle of over approx. 105°, the monitor
image is inverted vertically. If the viewfinder is pulled
out at that time, it also switches on.
Point the lens toward the subject (yourself when self-
recording) and start recording.
During Interface Shooting, the monitor image and
indications do not appear inverted as they would
when viewing a mirror.
NOTES:
● During Interface Shooting, the “Tape Running” indicator
and warning indications (
੬ pg. 87, 88) are the only
ones that are shown; they appear reversed in the
display as they would when viewing a mirror, but are
not reversed in the recording.
● The tape remaining indicator does not appear during
interface shooting. However, when the remaining time
reaches 2 minutes, the indicator appears showing the
remaining time:
(blinking)
(blinking) (blinking)
NOTES:
● When you use the LCD monitor outdoors in direct sunlight, the LCD monitor may be difficult to see. If this happens, use
the viewfinder instead.
● The image will not appear simultaneously in the LCD monitor and the viewfinder except during Interface Shooting. It
will appear in the viewfinder when the LCD monitor is in the lock position, and it will appear on the LCD monitor when
fully extended.
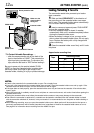
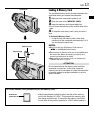
● The cassette holder cannot be opened unless a power supply is attached.
● There may be a delay after you open the cassette holder cover until the cassette holder opens. Do not use force.
● Once the cassette holder is closed, it recedes automatically. Wait until it recedes completely before closing the
cassette holder cover.
● When the Recording Start/Stop button is pressed, it may take a few seconds before actual recording starts. “
”
starts rotating when the camcorder actually starts recording.
● The time required to calculate and display the remaining tape length, and the accuracy of the calculation, may vary
according to the type of tape used.
● “TAPE END” appears when the tape reaches its end, and the power goes off automatically if left in this condition for 5
minutes. “TAPE END” also appears when a cassette at its end is loaded.
● If the Record-Standby mode continues for 5 minutes, the camcorder’s power shuts off automatically. To turn the
camcorder on again, push back and pull out the viewfinder again or close and re-open the LCD monitor.
● When a blank portion is left between recorded scenes on the tape, the time code is interrupted and errors may occur
when editing the tape. To avoid this, refer to “Recording from the middle of a tape” (
੬ pg. 23).
● During recording, sound is not heard from the speaker. To hear the sound, connect optional headphones to the
PHONE connector. The sound volume is at the level it was adjusted to during playback (
੬ pg. 25).
● To turn the tally lamp or beep sounds off,
੬ pg. 28, 30.