


Controlling Exposure
April 28, 2004 7-19
Notes:
• For the first frame the mark is displayed continuously in the Top
Status LCD. For the second frame the mark blinks slowly. For the
third frame it blinks quickly.
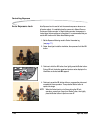
• In Self Timer mode, the camera automatically captures three
consecutive images.
• You can change the Drive mode during the Auto Bracketing operation.
• You cannot use Auto Bracketing mode with flash photography. Auto
Bracketing will not affect the output level of the flash.
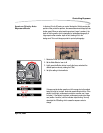
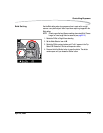
Cancelling Auto Bracketing 1. Rotate the D-Dial to .
2. Rotate the C-Dial to set the bracketing amount to 0.0.
3. Rotate the D-Dial to the Drive area.
Using Auto Bracketing with
Exposure Compensation
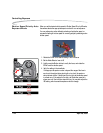
You can capture images with both the Auto Bracketing and Exposure
Compensation modes set. The combined values of Exposure Compensation
and Auto Bracketing appears on the Viewfinder display. For example: If you
set Exposure Compensation to +1.0 and Auto Bracketing to 0.7, the
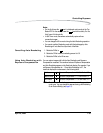
viewfinder displays the values seen in the following table.
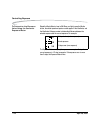
NOTE: The table show a bracketing exposure sequence of appropriate,
under, over. You may change the sequence using a the Bracketing
Order Custom Setting (see page 5-3).
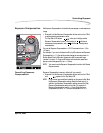
AB
AB
AB
First frame Exposure Compensation +1.0 & shift value 0.0
Second frame Exposure Compensation +1.0 & shift value -0.7
Third frame Exposure Compensation +1.0 & shift value +0.7
1.0
0.3
1.7