


9-4 April 28, 2004
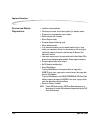
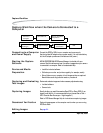
Capture Workflow
Occasional Verification To assure the highest image quality, evaluate test images at each location
and at the various illuminance conditions. Also use the Image LCD regularly
to verify that images are captured and stored correctly.
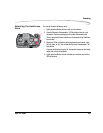
You may want your customer to review images while still on location. View
images using one of the following:
• Image LCD using one of several Image modes
• Connected video monitor. (The Image LCD is disabled when this is in
use.)
• Remove the memory card from the camera and plug it into a laptop
computer. View the images using KODAK PROFESSIONAL DCS Photo
Desk software.
Transferring Images When the photo session is complete, insert the memory card in a card
reader connected to your computer. You can then open, edit, transfer, copy,
and save images using the included software, or you can send them to a
lab.
• Create folders on the computer hard drive for storing images. Use
meaningful names to help you locate the images.
• Backup your original images on a CD or Zip disk.
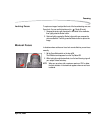
Editing Images If you save images as JPEG on your camera, you can open and edit them in
any image editing application.
Two editing applications are included with your camera. These applications
allow you to do enhanced DCS-specific image editing. Refer to each
application’s associated Help.
KODAK PROFESSIONAL DCS Photo Desk—Allows you to open Raw
(.dcr) or JPEG (.jpg) files, perform DCS-specific image edits, then save the
images in a variety of formats.
KODAK PROFESSIONAL Extended Range Imaging File Format
Module—Allows you to open ERI JPEG files. It reconstructs extended
dynamic range/color gamut images and displays a preview. You can
perform a limited set of DCS-specific image edits, then acquire the images
into ADOBE PHOTOSHOP or ADOBE PHOTOSHOP Elements.