


5577
5566
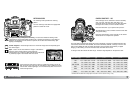
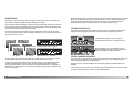
Advanced recording
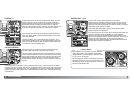
The drive modes control the rate and method images
are captured. Indicators showing the selected drive
mode appear on the monitor. The drive mode is set
with the drive-mode dial. Simply turn the dial using the
lever on the front to the appropriate position to select
the mode.
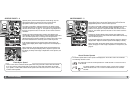
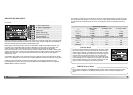
DRIVE MODES
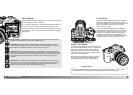
Single-frame advance bracketing - to take a series of images with differing exposure
(p. 58). Each image of the series is captured one by one.
Single-frame advance - to take a single image each time the shutter-release button is
pressed (p. 28). Interval recording can be used (p. 78).
10 second self-timer - to delay the release of the shutter by 10 seconds. Used for self-
portraits (p. 57).
Continuous advance bracketing - to take a series of images with differing exposure (p.
58). The series is advanced automatically.
2 second self-timer - to delay the release of the shutter by 2 seconds (p. 57).
Continuous advance - to take a series of images when the shutter-release button is
pressed and held (p. 57).
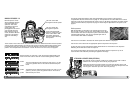
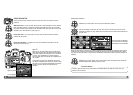
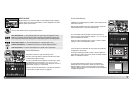
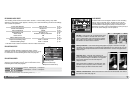
FRAMES-REMAINING COUNTER
The frames-remaining counter indicate the approximate number of frames that can be stored in the
camera buffer memory while recording. This number changes as images are captured and saved to
the memory card.
Frames-remaining counter
Continuous-advance mode allows a series of images to be captured while holding down the
shutter-release button. The maximum frame rate with continuous advance is 3 frames per second.
The maximum number of frames that can be captured depend on the image size and quality
settings. Approximately nine RAW and RAW & JPEG images can be captured, see the chart for
other combinations. Numbers are approximate and depend the subject.
CONTINUOUS-ADVANCE NOTES
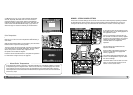
SELF-TIMER NOTES
With the camera on a tripod, compose the picture as described in the basic recording section (p.
28). Press the shutter-release button partway down to lock the exposure and focus. Press the
shutter-release button all the way down to begin the countdown. Because focus and exposure are
determined when the shutter-release button is pressed, do not stand in front of the camera when
taking a self-timer image. Always confirm the focus with the focus signals before beginning the
countdown. Attach the eyepiece cap if a bright light source is behind the camera, see page 59.
With the ten-second self-timer, the self-timer lamp on the front of the camera and the audio signals
indicate the countdown.The lamp glows steadily just before the shutter fires. To stop the
countdown, change the position of the drive-mode dial or flash (lift it or push it
down), or turn the camera off. The audio signal can be turned off in section 1
of the setup menu (p. 102). The mirror raises just before the exposure.
With the two-second self-timer, no indication is given during the countdown.
The mirror raises when the countdown starts.
L
Extra fine
Fine
Standard
12
15
19
S
20
30
43
M
14
19
26
AF Zoom xi and Power Zoom lenses cannot be zoomed when
taking pictures with continuous advance. The frame rate is
affected by the flash as it must recharge between exposures.
Focus and exposure are set between each frame with
continuous AF and Auto AF.