


20
Supplementary instruction manual V 1.2 07/2002
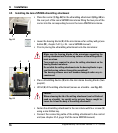
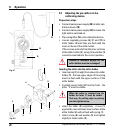
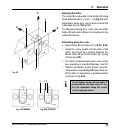
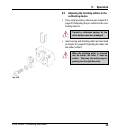
5.2 Adjusting the pre-millers in the
calibrating device
Preparatory steps
Connect mains power supply (20) to miller cali-
bration device (18).
Connect mains power supply (20) to mains: the
light bulb is switched on.
Place magnifier (16) onto calibration device.
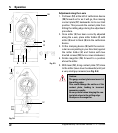
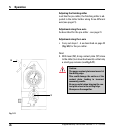
Loosen regulating screws (6), (7) and (11) in
miller holder (2) until they are flush with the
inner surfaces of the miller holder.
If the screws protrude from the inner surfaces
of the miller holder (2), spring (1) and miller (3)
cannot be inserted into the correct position.
Twisted or deformed springs for the
miller holders must be exchanged!
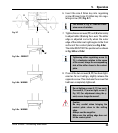
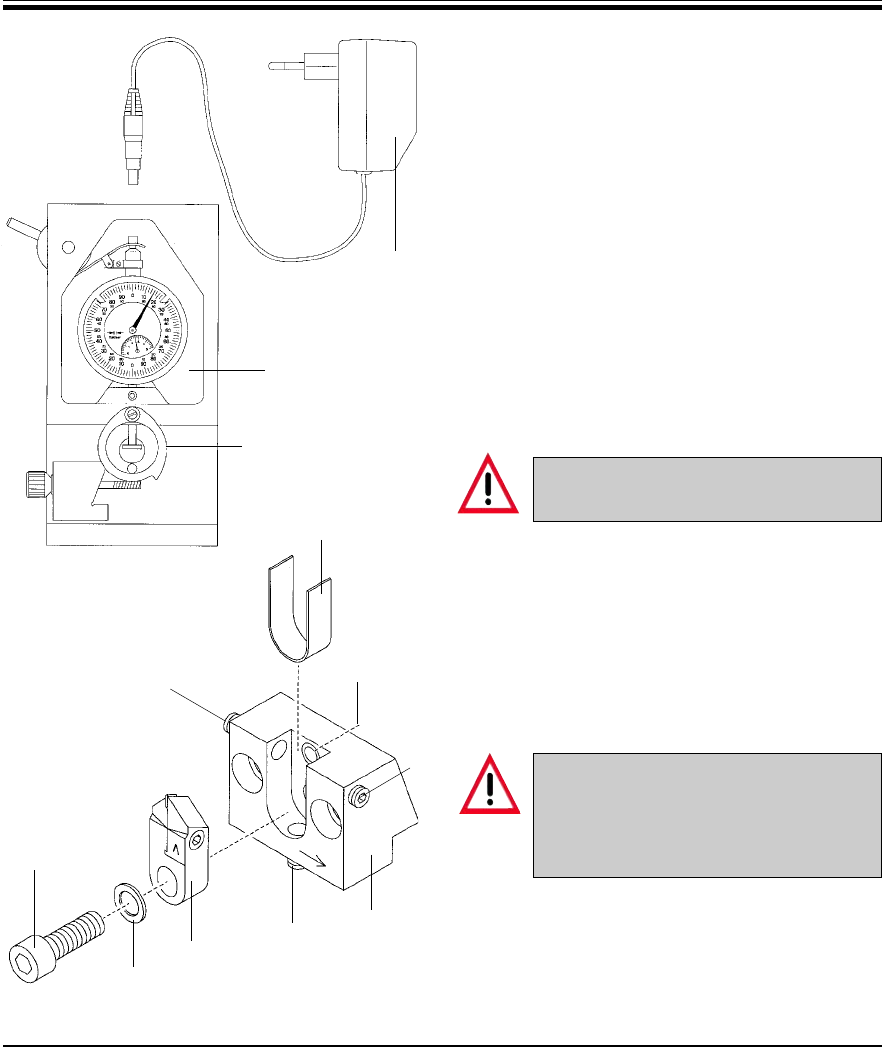
Inserting the miller into the miller holder
Insert spring (1) straight from above into miller
holder (2) - the two upper edges of the spring
must be flush with the upper surface of the
miller holder.
Carefully insert miller (3) from the front - the
letter V must be visible.
When the miller is inserted into the
holder the letter V must be visible. -
That way, the milling edge is pointing
into the right direction.
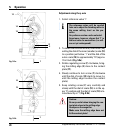
Insert the miller (3) completely - it must fit
against the rear and lower inner surface of the
miller holder (2) and be flush with spring (1).
Insert screw (4) and washer (5) and tighten
slightly to fasten miller (3) .
Fig. 5.1
20
18
16
Fig. 5.2
6
6
11
7
1
3
2
5
4
5. Operation