


28
Supplementary instruction manual V 1.2 07/2002
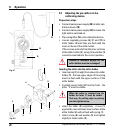
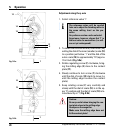
Adjustment along the y-axis
1 Select the same reference value as was set
for the pre-miller.
Pre-miller and finishing miller used for
milling a specific sample must be ad-
justed using the same reference value.
This ensures that both milling edges
hit the sample at exactly the same
height.
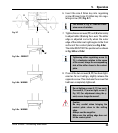
Minor differences in height can still be
adjusted via the height adjustment but-
ton on the control unit, once the miller
holder has been attached to the milling
spindle (see chapter 5.4.13, p. 36 the
Leica SM2500 manual).
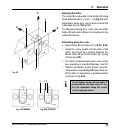
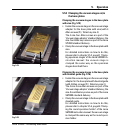
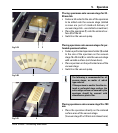
2 To select the reference value, move lever (12),
setting the dial of the inner (smaller) scale (13)
to a position just below 1 and the dial of the
outer scale (14) to approximately 70 (approx.
10 oclock) (Fig. 5.14a).
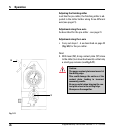
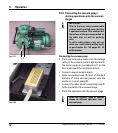
3 Rotate regulating screw (7) clockwise, bring-
ing the milling edge (3) close to the contact
plate (17).
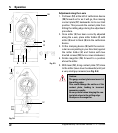
4 Slowly continue to turn screw (7) clockwise
until the dial of scale (14) starts to move (i.e.
until the milling edge touches the contact
plate).
5 Keep rotating screw (7) very carefully and
slowly until the dial of scale (14) is in the up-
per 0 position and the dial of scale (13) is lo-
cated exactly at 1 (Fig. 5.14b).
Caution:
Be very careful when bringing the con-
tact plate close to the milling edge.
Always use the magnifier.
Make sure the milling edge does not
hit the contact plate!
12
14
13
17
3
7
14
13
Fig. 5.14 a
Fig. 5.14 b
5. Operation
7