


79
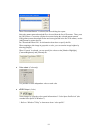
4.8.4 When Color (/Grayscale) is specified
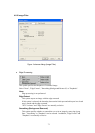
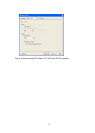
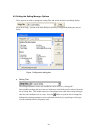
For color scanners, when “Color” is selected in the [Image Mode], the [Advance] dialog
changes as follows. And in case of some color scanners, when selecting “Grayscale” the
[Advance] dialog change as same as selecting “Color”.
There are two image samples which are “Sample (before processing)” and “After (after
processing)” on this dialog. When you change a setting item, the effect of the setting item is
reflected in the image “After”.
You can specify the items, checking their effect.
<Image Mode : Color selected> <Image Mode : Grayscale selected>
Figure Advance dialog (Color / Grayscale)
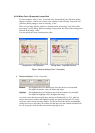
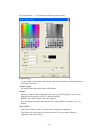
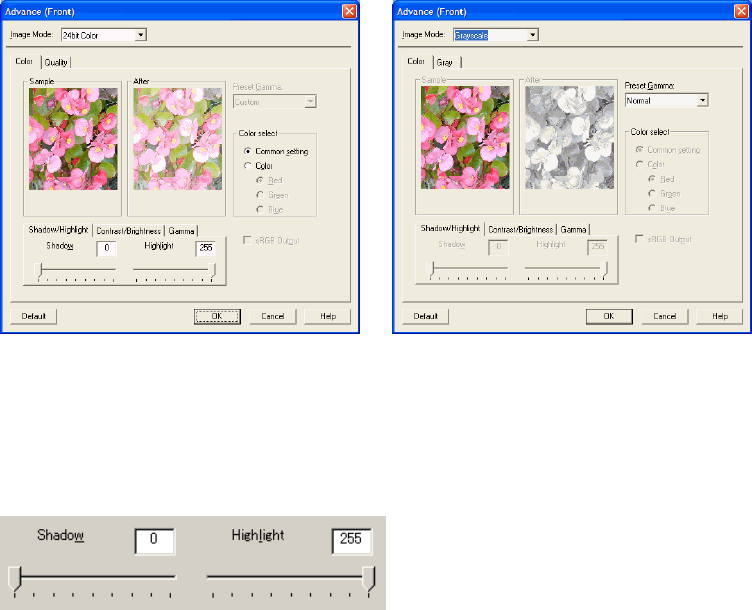
♦ Shadow/Highlight (Color / Grayscale)
Shadow : The highlight allows the darkest part of the document to be controlled.
The higher the shadow value, the darker the image.
Highlight : The highlight allows the brightest part of the document to be controlled.
The higher the highlight value, the lighter the image.
Any levels on the document outside these settings are flooded (all 0 or 255), while the
interval between the shadow and highlight settings are equally divided into 255 levels,
which are used to create the output images. This means that if the shadow and highlight
settings are close to each other, the contrast for that interval in the scanned document will
be very strong (but with all other areas maximizing high or low).