13
DP12
Fig. 7 Fig. 8
Fig. 9
BASIC OPERATIONS
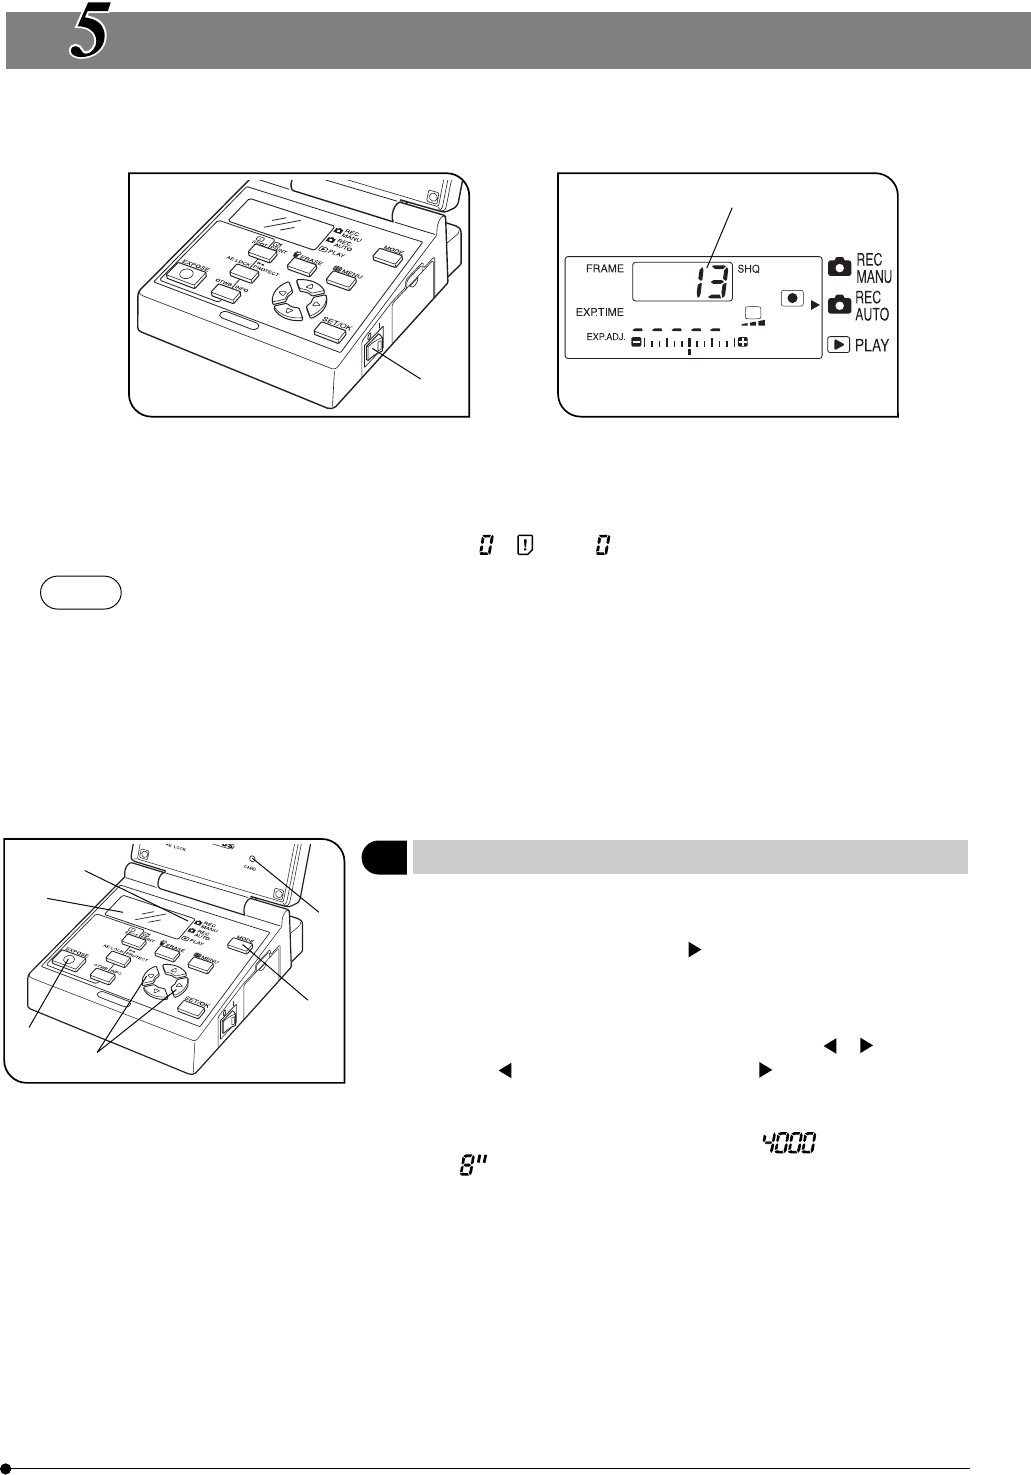
}After installing the SmartMedia, press the main switch 1 of the control box to turn it ON. (Fig. 7)
· The LCD panel shown in Fig. 8 shows the setup before turning power ON and the number of remaining pictures 2 in the
current picture quality mode (see page 21).
· After turning the camera system ON, first set the current and date and time (see page 23).
#When the number of remaining pictures becomes , “ ” and “ ” on the LCD panel blink.
NOTES
· As the data amount is variable depending on the recording object, the actual number that can be
recorded may sometimes exceed the displayed number of remaining pictures. Also, there may be cases
in which the number of remaining pictures does not decrease even after recording a picture or does not
increase even after erasing a picture.
· The number of remaining pictures is also variable depending on the capacity of each SmartMedia card.
· The number of remaining pictures is also variable when the SmartMedia card contains a DPOF print
reservation file, etc.
· The SmartMedia card has a service life. The available capacity may decrease depending on the status of
the flash memory incorporated in the SmartMedia.
· “999” is displayed when the number of remaining pictures is 999 or more.
1
Selecting the Record Mode (MODE, EXPOSE)
(Fig. 9)
}There are two record modes, the REC AUTO (automatic) and REC MANU.
(manual) modes.
1. Press the MODE button 1 so that 2 on the LCD panel indicates “REC
AUTO” or “REC MANU.”.
#When “REC MANU.” is selected, it is required to set the exposure
time.
2. To set the exposure time, press either MOVE button or 3.
}Pressing decreases the exposure time and increase it. (Factory setup: 1/
60 sec.)
The exposure time is displayed in the range from 1/4000 to 8 sec. (at ISO
25). In the display 4, 1/4000 sec. is show as and 8 sec. is shown
as .
3. Make sure that the specimen is in focus, and then press the EXPOSE
button 5 to record the picture. The CARD access indicator 6 blinks
during recording.
1
2
1
2
³
|
ƒ
…
