


Broadband Router User Guide
40
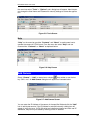
Snap Shot
To snap shot a single image, highlight the camera you wish to snap shot from the list
view format. Select “Camera” > “Snap shot” from menu bar or click from toolbar
or use the hot-key “F5”. A Save Image dialog box will appear for specifying the path of
snap shot picture. Or from the viewing mode either 1, 4, 9, 16 cameras right click on
the icon located on the upper left corner of the screen and a menu will appear and
select the “Snap shot” icon. A Save Image dialog box will appear for specifying the
path of snap shot picture.
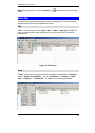
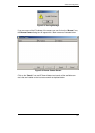
Record Images
Choose a camera first, from the menu bar select “Camera” > “Start” or click
from toolbar or use the hot-key “F7”. The recorded file will be saved as AVI format.
Video recording can also be activated from the viewing mode either 1, 4, 9, 16 cam-
eras right click on the icon located on the upper left corner of the screen and a menu
will appear. Select the “Start” icon. If you want to specify the path of the recording file
saved, please refer to Property section.
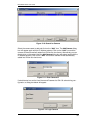
To stop recording a camera, you must select the camera from list view format first.
From the menu bar select “Camera” > “Stop” or click from toolbar or use the hot-
key “F9”. The recording function will be stopped. The alternative way is from the view-
ing mode either 1, 4, 9, 16 cameras right click on the icon located on the upper left
corner of the screen and a menu will appear. Select the “Stop” icon. The recording
function will be stopped.
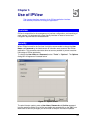
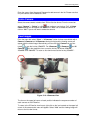
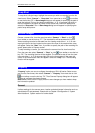
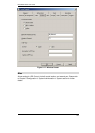
Property
“Property” option can use to configure the settings of ICA-100 series. Select a cam-
era from list view format, then select “Camera” > “Property” from menu bar or click
from toolbar or use the hot-key “F2”. Then Camera Property dialog box will appear
allowing to configure the chosen camera.
Note: Make sure to click the “Apply” button to save changes you have made to keep
the information updated.
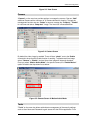
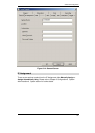
General
It allows settings for the camera name, location and administrator information such as
administrator ID and password. Please refer to Chapter 3 Configuration à System
Administration à System section for further details.