28 29
IP300 Manual
Click to support 15 positions. Begin by rotating camera to the position
you want. Then click the preset position icon and a pop-up will appear with 15
position slots. Keep moving camera to desired positions and set one at a time
much the same way you’d preset the radio stations in your car. Then whenever
you hit preset, the dialogue box with all the preset positions will appear and
you can choose any of the fteen positions you’ve preset by clicking on the
appropriate number.
NOTE: If, as the operator, you request a control for which your level of authority
does not exist, a pop-up interface will appear (see gure 2.6) requesting user
name/password. Not until it requests 3 times can you return to operator login.
2.9 ADMINISTRATOR ACCESS
For all administrator settings, please see 3.1-3.22)
3 ADMINSTRATOR SETTINGS
When logged in as the Administrator you have access to all controls and
functions of the camera which include the following functions visitors and
operators cannot access:
Figure 4.6
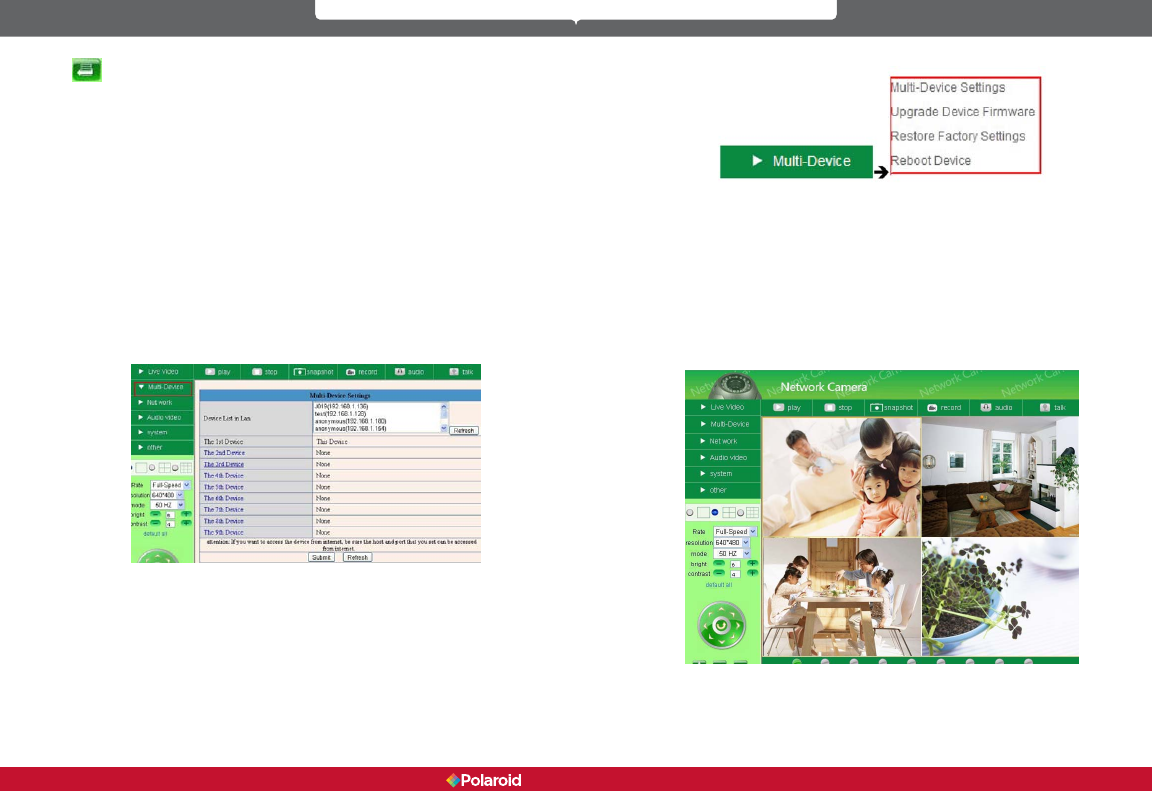
3.1 MULTI-DEVICE SETTINGS
Polaroid IP Camera system software can support up to 9 devices on the network
at one time.
3.1.1 Set Multi-Device on LAN
When you call up the Multi-Service Device window, you can view all the devices
you have set up on the LAN. The rst device is the default one. You can add up
to 9 cameras for monitoring. To add more devices, click on the next device (i.e.
2nd device), then click on a camera in the device list. It will ll in the camera
information; then add user name and password and then click.
Add. After you’ve set all devices in this manner, click on submit.
Figures 4.8
Polaroid • Settings Polaroid • Settings


