


Displaying the Markers and Zebra Patterns
40
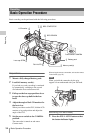
Recording
During recording, various markers and zebra
patterns can be inserted into the image on the
LCD monitor/EVF screen.
This does not affect recording signals.
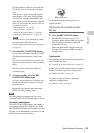
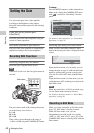
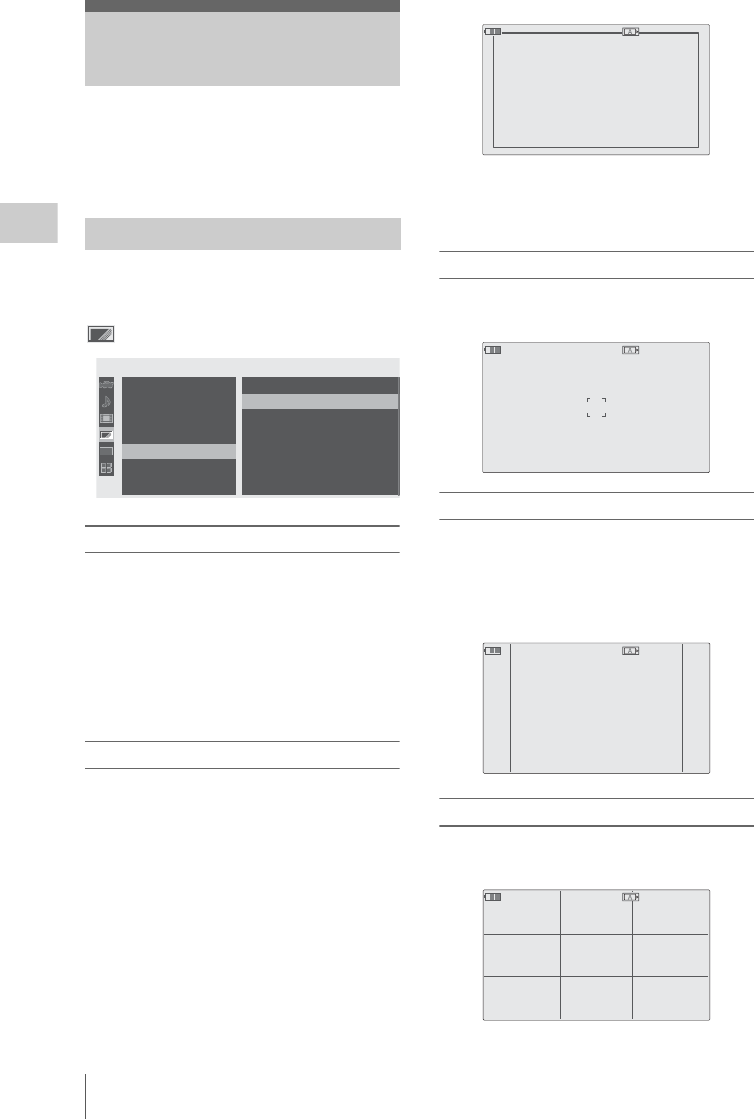
Use “Marker” of the LCD/VF SET menu.
Press the MENU button to set the camcorder to
Menu mode, display the LCD/VF SET menu with
, and select “Marker” from the menu.
Activating the marker indications
• Set “Setting” to “On” then turn the markers on/
off independently.
No marker is displayed when “Setting” is “Off.”
• Assigning the Marker on/off function to one of
the assignable buttons permits you to operate
“Setting: On/Off” by pressing the button.
For the assignable buttons, see “Changing
Functions of the Assignable Buttons” on page 57.
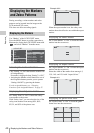
Displaying the safety-zone marker
Set “Safety Zone” to “On” to insert the safety-
zone marker to the screen.
With “Safety Area” you can select the size of the
safety-zone marker from among 80%, 90%,
92.5%, and 95% of the picture area.
When the aspect marker is on, the safety zone
marker shows the effective area within the aspect
marker.
Displaying the center marker
Set “Center Marker” to “On” to insert the center
marker into the screen area.
Displaying the aspect marker
Set “Aspect Marker” to “On” to insert the aspect
marker into the screen area.
Select the width of the marker from among 4:3,
13:9, 14:9, and 15:9 with “Aspect Select.”
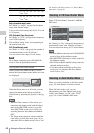
Displaying the guide frame lines
Set “Guide Frame” to “On” to insert the guide
frame lines into the screen area.
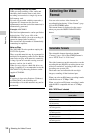
Displaying the Markers
and Zebra Patterns
Displaying the Markers
00:00
Return
LCD
EVF
Peaking
M
arker
Zebra
Display
O
n/
O
ff
LCD/VF
SET
Return
Setting
Safety
Z
one
Safety
Area
Center
M
arker
Aspect
M
arker
Aspect
Select
:
O
n
:
O
n
:
90
%
:
O
n
:
O
n
:
4:3
B
B
B
B
B
B
B
TCG 00:00:00:00 120min
STBY
Example: 95%
TCG 00:00:00:00 120min
STBY
TCG 00:00:00:00 120min
STBY
Example: 4:3
TCG 00:00:00:00 120min
STBY