


13
1
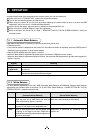
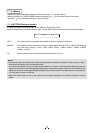
AWB (Automatic white balance)
• Set the MODE to AWB on the WHT BAL menu.
Change the C.TEMP (color temperature conversion) setting, if necessary.
(Refer to the item “7.2 (3) WHT BAL (White Balance)”.)
3200K : Appropriate for indoor shooting.
5600K : Appropriate for outdoor shooting.
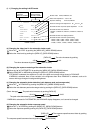
• If the color bar pattern is displayed on the screen or if the index menu/menu is displayed, press the [DISP] button
to disable the color bar pattern or the character display on the monitor.
• Shoot a known white object entirely in the area set by the AWB menu (refer to the item “7.2 (3) (3.1) (d)
Confi rm the contents of the zone area selected by AWB” ) and push [DATA UP] button for approx. 1 second.
• The character AWB blinks on the screen when the AWB starts.
• The character AWB stops blinking when the AWB fi nishes, and the result is displayed for approx. 1 second.
Display Meaning
AWB OK Automatic white balance adjustment fi nished correctly.
AWB NG
LEVEL LOW
Automatic white balance adjustment cannot be performed because the video level is too low.
Adjust the video level by increasing the illumination or opening the lens iris.
AWB NG
LEVEL HIGH
Automatic white balance adjustment cannot be performed because the video level is too high.
Adjust the video level by decreasing the illumination or closing the lens iris.
AWB NG
C. TEMP LOW
Automatic white balance adjustment cannot be performed because the color temperature is
too low.
If the C.TEMP is set to 5600K, set to 3200K.
If the message appears with the C.TEMP set to 3200K, change the illumination or use a color
temperature conversion fi lter.
AWB NG
C. TEMP HIGH
Automatic white balance adjustment cannot be performed because the color temperature is
too high.
If the C.TEMP is set to 3200K, set to 5600K.
If the message appears with the C.TEMP set to 5600K, change the illumination or use the color
temperature convearsion fi lter.
AWB NG Automatic white balance adjustment cannot be performed for other reasons. Such as no white
area is included in an object, etc.
2
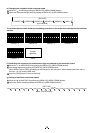
MANUAL (Manual white balance)
• Set the MODE to MANUAL on the WHT BAL menu.
(Refer to the item “7.2 (3) WHT BAL (White Balance)”.)
• Shoot a known white object, set the white balance by adjusting the levels of R GAIN and B GAIN on the menu,
confi rming with a monitor or a vector scope.
(Refer to the item “7.2 (3) (3.2) Changing gain in MANUAL mode”.)
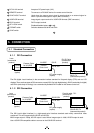
6. 3 Scene File
Five scene fi les (A, B, C, D, E) are available as user memories for this unit. These are chosen depending on shooting
conditions. By using the [FILE] button, the camera operation is changed immediately from the currently selected
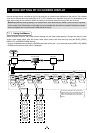
Scene File to the next. (Refer to the item “7. MODE SETTING BY THE ON SCREEN DISPLAY”.)
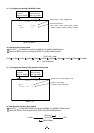
• While any menu is displayed, pressing the [FILE] button will display the menu settings for the next Scene File:
FILE A 䊲
䊲䊲
䊲 FILE B 䊲
䊲䊲
䊲 FILE C 䊲
䊲䊲
䊲 FILE D 䊲
䊲䊲
䊲 FILE E
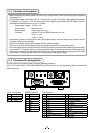
• If the color bar pattern is displayed on the screen, press the [DISP] button to switch to the video signal screen.
• When the [FILE] button is pressed while the video signal screen is displayed, the current scene fi le selection at that
time is displayed for approx. 3 seconds in the upper right corner of the screen. If the [FILE] button is pressed again
while the position is displayed, the scene fi le cycles as described above.
Note:
The scene fi le does not include the data set in “I/P MODE” “BAUD RATE” within the “OPTION 1” menu.
Refer to the item “7.2 (8) Menus” for the contents that can be set in OPTION 1.