36
Functions of the Add Content Window Set
Chapter 4 Content Preparation
Management” window. When the automatic deletion of
content from the players feature in the “System Setup”
window is enabled, the content will be deleted from the
players automatically on the date displayed, so that the
hard disk drive of the players will not be full of unneed
material.
Normally, no operation for “delete date” is required, but
the delete dates can be specified manually when:
• you want to use a piece of material only in a certain
period.
However, the manually specified delete date may be
modified by the system, when the piece of material is
used in a schedule for a later date, for example.
• you want to keep a piece of material on the hard disk of
each player.
You can make the delete date the 31st of December,
9999 so that players never delete the content.
• you want to clear the delete date specified before, or
change the delete date from the 31st of December, 9999
to any other date, so that the piece of material will be
deleted from players.
See “Change Delete Date command” on page 38 for
details.
When you specify a delete date to a piece of material
manually, the VSPA-D7 software only allows you to
specify a date 30 days, or later, from today.
Functions of the Add
Content Window Set
Menus in the Content Management
Window
Right-clicking in the “Content Management” window
displays a context-menu to provide functions you can use
in the window.
The menu varies, depending on the selected tab, but the
following commands are contained in the menu. Some of
the commands also appear as buttons on the “Content
Management” window toolbar.
New command
Appears when the “Streaming,” “URL,” “Text,” or
“Control” tab is selected.
It opens a window in which you can create a new piece of
material of the selected type.
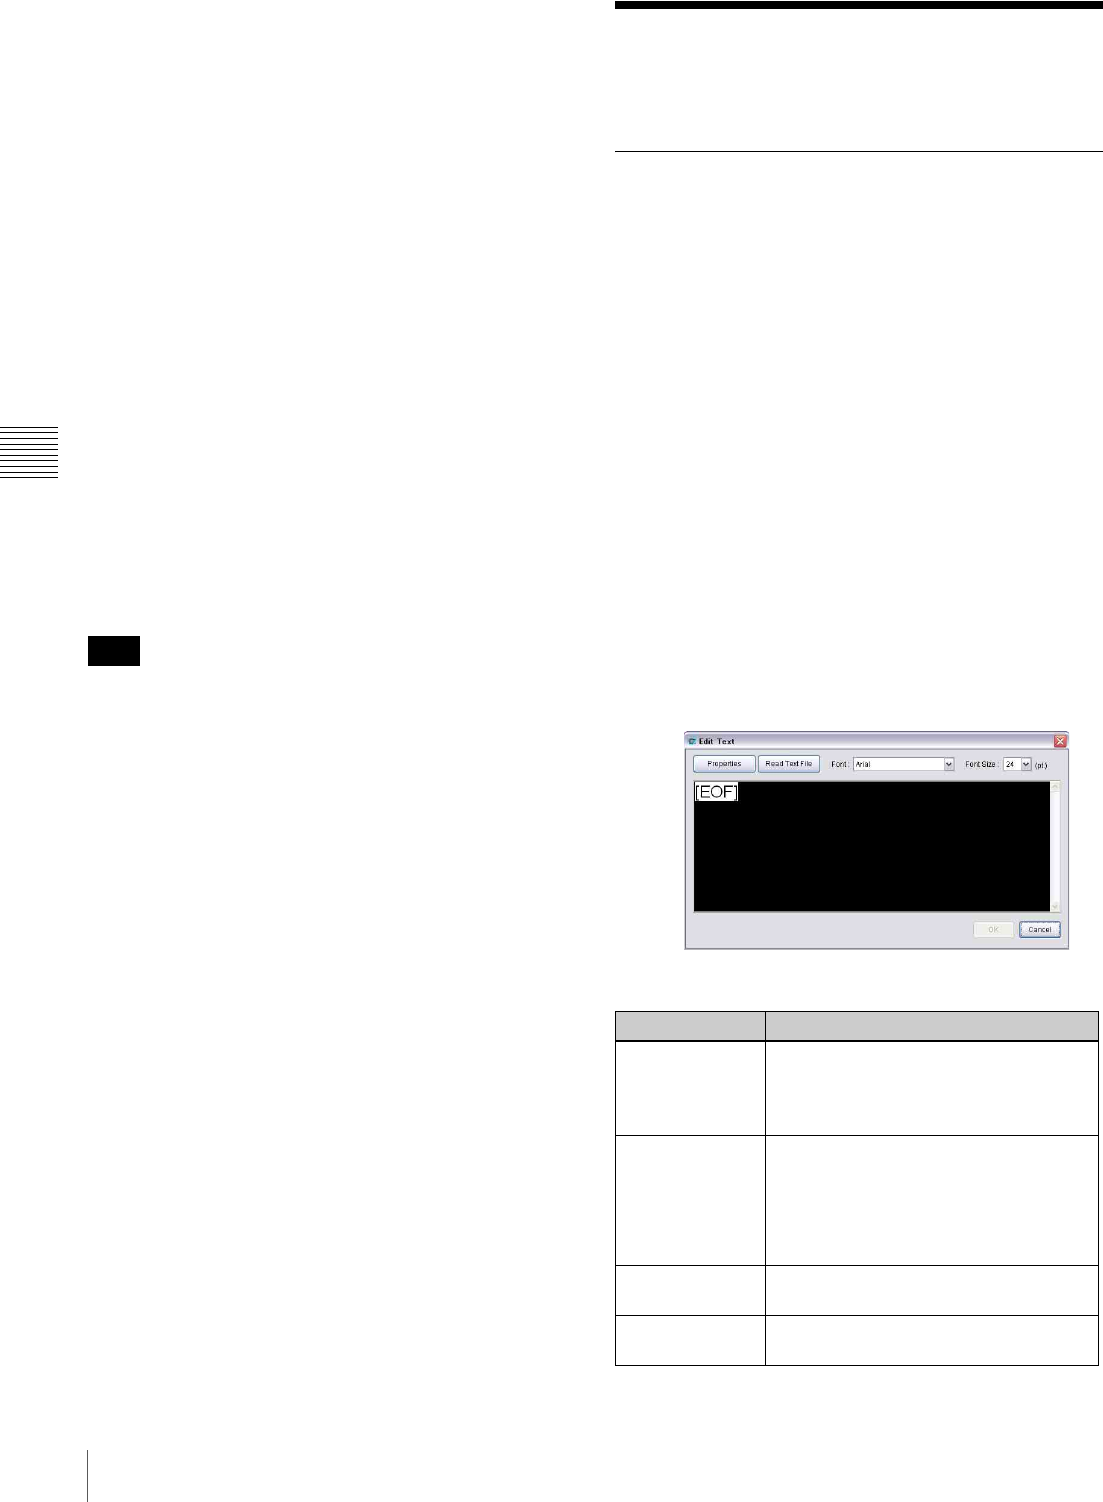
When the “Text” tab is selected
The “New” command displays the “Edit Text” window.
There are the following buttons and items in the window.
Enter text or read a text file in this window, and click [OK]
to create a piece of text material.
Note
Item Description
Properties button Opens the “Text Properties” window.
See “Creating/Registering text material”
on page 18 for details on the “Text
Properties” window.
Read Text File
button
Opens the “Read Text File” window.
When you have a text file in which text to
be displayed is stored, specify the file in
the “Read Text File” window, then click
[Open]. This will display the text stored
in the file in the “Edit Text” window.
Font drop-down
list box
Selects the font to be used for displaying
the text material.
Font Size drop-
down list box
Selects the font size to be used for
displaying the text material.
