


AXIS 211M - Troubleshooting
36
Axis Support
If you contact Axis support, please help us to help you solve your problems, by providing the server report, the
log file and a brief description of the problem.
Server Report - go to Setup > System Options > Support Overview. The server report contains important
information about the server and its software, as well as a list of the current parameters.
The Log file is available from Setup > System Options > Logs & Reports. The Log file records events in the unit
since the last system restart and can be a useful diagnostic tool when troubleshooting.
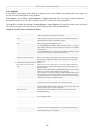
Symptoms, Possible Causes and Remedial Actions
Problems setting the IP address
When using ARP/Ping. Try the installation again. The IP address must be set within two minutes after running
the ARP command. Ensure the Ping length is set to 408.
The camera is located on a different
subnet.
If the IP address intended for the camera and the IP address of your computer are
located on different subnets, you will not be able to set the IP address. Contact your
network administrator to obtain an appropriate IP address.
The IP address is being used by another
device.
Disconnect the camera from the network. Run the Ping command. (In a Command/DOS
window, type ping and the IP address of the unit).
If you receive: Reply from <IP address>: bytes = 32; time = 10 ms..... - this means
that the IP address is already in use on your network. You must obtain a new IP address
and reinstall the unit.
If you see: Request timed out - this means that the IP address is available for use with
your camera. In this case, check all cabling and reinstall the unit.
Possible IP address conflict with
another device on the same subnet.
The static IP address in the camera is used before the DHCP server sets a a dynamic
address. This means that if the same default static IP address is also used by another
device, there may be problems accessing the camera. To avoid this, set the static IP
address to 0.0.0.0.
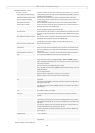
The camera cannot be accessed from a Web browser
The IP address has been changed by
DHCP.
1) Move the camera to an isolated network, or to one with no DHCP or BOOTP server.
Set the IP address again, using the AXIS IP Utility (see the Installation Guide) or the
ARP/Ping commands.
2) Access the unit and disable DHCP in the TCP/IP settings. Return the unit to the main
network. The unit now has a fixed IP address that will not change.
3) As an alternative to 2), if dynamic IP address via DHCP or BOOTP is required, select
the required service and then configure IP address change notification from the net-
work settings. Return the unit to the main network. The unit will now have a dynamic
IP address, but will notify you if the address changes.
Proxy server. If using a proxy server, try disabling the proxy setting in your browser.
Other networking problems. Test the network cable and connectors by connecting it to another network device,
then Ping that device from your workstation. See the instructions above.
Cannot log in. Check that you are using the proper password. If HTTPS is enabled, ensure that the cor-
rect protocol (HTTP or HTTPS) is used when attempting to log in. You may need to man-
ually type in http or https in the browser's address bar.
Incorrect host name. Check that the host name and DNS server settings are correct. See the basic and
advanced TCP/IP settings.
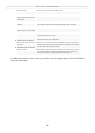
Cannot send notifications, uploads, alarms, etc, to a destination outside the local network
Firewall protection. The camera can be configured to use a SOCKS server to reach networks on the other
side of a firewall/proxy server.
Your camera is accessible locally, but not externally
Firewall protection. Check the Internet firewall with your system administrator.
Default routers required. Check if you need to configure the default router settings.
Poor or intermittent network connection.
Network switch. If using a network switch, check that the port on that device uses the same setting for
the network connection type (speed/duplex) as set in the advanced TCP/IP settings.
The Auto-Negotiate setting is recommended.