


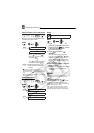

Connecting to a Printer
70
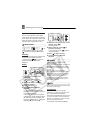
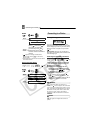
print by selecting 2-, 4-, 9- or [16-UP]. You can
also use this setting to print on the specially
designed photo stickers sheets.
- When the paper size is set to [A4] you can
print 4 copies on the same sheet by selecting
[4-UP].
Canon PIXMA/SELPHY CP Printers:
- When the paper size is set to [CREDITCARD]
you can print multiple small copies on a single
print by selecting 2-, 4-, or [8-UP]. You can also
use [8-UP] to print on the specially designed
photo stickers sheets.
- When the paper size is set to [10 x 14.8 cm]
or [9 x 13 cm] you can print 2 or 4 copies on the
same sheet by selecting [2-UP] or [4-UP].
- When you are using the specially designed
wide-sized photo paper you can set the paper
size to [DEFAULT] and print 2 or 4 copies on
the same sheet by selecting [2-UP] or [4-UP].
Printing after Changing the Print Settings
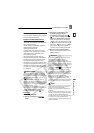
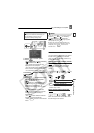
1 Press .
• The print setting menu appears.
• Depending on the printer, the
message “BUSY.” may appear before
the camcorder displays the print
setting menu.
2 In the print settings menu, select
( ) the setting you want to change
and press .
3 Select ( ) the desired setting
option and press .
4 Select ( ) [PRINT] and press
.
• Printing starts. The print setting menu
disappears when the printing is
completed.
• To continue printing, select another
still image.
T
O CANCEL THE PRINTING
Press while printing. A confirmation
dialog appears. Select [OK] and press .
With Canon’s PictBridge compatible printers,
the printing will stop immediately (even if not
completed) and the paper will be fed through.
P
RINTING ERRORS
If an error occurs during the printing process, an
error message appears ( 78).
- Canon’s PictBridge compatible printers:
Resolve the error. When printing does not
resume automatically, select [CONTINUE] and
press . If [CONTINUE] cannot be
selected, select [STOP], press and retry
printing. Refer also to the printer’s instruction
manual for details.
- If the error still persists and printing does not
restart, disconnect the USB cable and turn off
the camcorder and the printer. After a short
while, turn them on again, set the camcorder to
mode and restore the connection.
W
HEN YOU HAVE FINISHED PRINTING
Disconnect the cable from the camcorder and
printer and turn off the camcorder.
IMPORTANT
The following still images may not be
correctly printed with a PictBridge compatible
printer.
- Images created or changed on a computer
and transferred to the memory card.
- Images recorded with the camcorder but
edited on a computer.
- Images whose file names were changed.
- Images not recorded with this camcorder.
Observe the following precautions during
printing:
- Do not turn off the camcorder or the printer.
- Do not change the position of the /
switch.
- Do not disconnect the USB cable.
- Do not remove the memory card.
If the message “BUSY.” does not disappear,
disconnect the USB cable and restore the
connection after a short while.
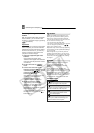
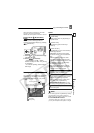
Trimming Settings
Set the paper size and page layout before
changing the trimming settings.
1 In the print setting menu, select
( ) [TRIMMING] and press .
SET
SET
SET
SET
SET
SET
SET
SET
SET