


Replacing an Ink Cartridge 47
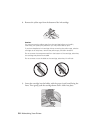
Caution:
To avoid damaging the printer, never move the print head by hand.
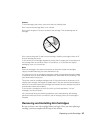
Don’t remove the cartridge label, or ink will leak.
Don’t touch the green IC chip on the side of the cartridge. This can damage the ink
cartridge.
Don’t remove the green IC chip from the cartridge. Installing a cartridge without an IC
chip can damage the printer.
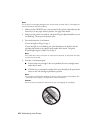
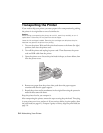
If you remove an ink cartridge temporarily, protect the ink supply port on the bottom of
the cartridge from dirt and dust. Place it in a small box, or, if you have the original
packaging, return it to its own box.
Note:
Store ink cartridges in the same environment as the printer. Stand the cartridges
upright; the label identifying the color should be on top.
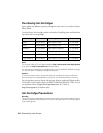
You cannot print if an ink cartridge is expended. Leave the expended cartridge installed
in the printer until you have obtained a replacement. Otherwise the ink remaining in the
print head nozzles may dry out.
This printer uses ink cartridges equipped with IC chips that monitor the amount of ink
used by each cartridge. Cartridges are usable even if they are removed and reinserted.
Some ink is consumed each time cartridges are inserted, however, because the printer
automatically checks their reliability.
If you remove a cartridge that is low (for which you have received an “Ink low”
message), you cannot reuse it.
Ink is consumed during the following operations: print head cleaning, self-cleaning
(performed when the printer is turned on), and ink charging (when an ink cartridge is
installed).
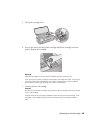
Removing and Installing Ink Cartridges
Be sure you have a new ink cartridge before you begin. Once you start replacing a
cartridge, you must complete all the steps in one session.