48 Maintaining Your Printer
Note:
Do not open ink cartridge packages until you are ready to install the ink. Cartridges are
vacuum packed to maintain reliability.
1. Make sure the CD/DVD tray is not inserted in the printer, and make sure the
front tray is in the paper (lower) position. See page 8 for details.
2. Make sure the printer is turned on (the green P power light should be on, but
not flashing). Then open the printer cover.
3. Press and release the H ink button.
If your ink light is off, go to step 5.
If your ink light is on or flashing, the print head moves to the left, and the
cartridge that needs to be replaced stops under the _ mark. The green
P power light begins to flash. Go to step 4.
Note:
Don’t hold down the H ink button for more than 3 seconds, or the printer will start
to clean the print head.
4. Press the H ink button again.
■ If more than one cartridge is low or expended, the next cartridge moves
under the _ mark.
■ If all the low or expended cartridges have been identified, the print head
moves to the ink cartridge replacement position.
Note:
You can also use the Status Monitor to find out which cartridge is expended. See
“Checking the Ink Supply” on page 44 for more information.
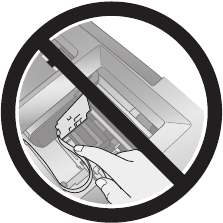
Caution:
Do not touch the area shown below when you are changing ink cartridges.


