


20 21
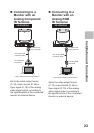
Installation and Connection
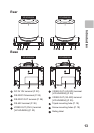
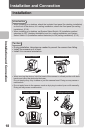
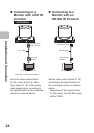
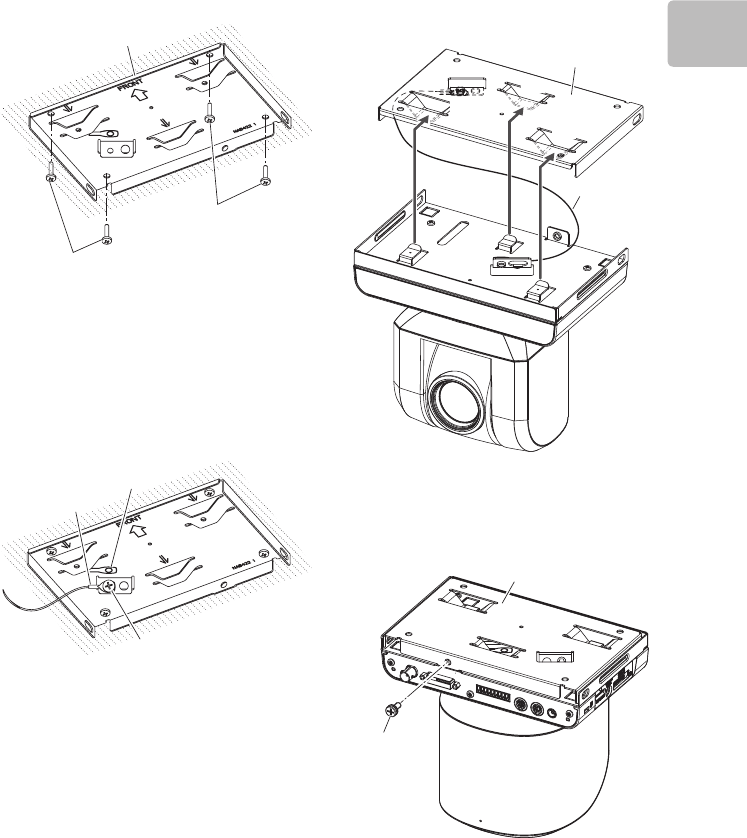
3 Mount the ceiling mount xture
(ceiling side) to the ceiling.
Use screws that t in the screw
hole of the ceiling mount xture
(ceiling side). (not included)
To prevent them from loosening,
use a at or spring washer as
needed.
Separately purchased screw
Separately purchased screw
Ceiling mount fixture
(Celling side)
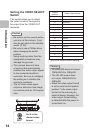
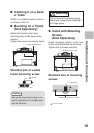
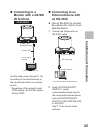
4 Attach the other end of the
safety wire you attached to the
camera in step 1 to the ceiling
mount xture (ceiling side) with
the included screws (M5 × 12).
Install the mounting hardware as
indicated by the mark.
Safety wire
Included screw (M5 × 12)
Mark
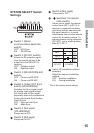
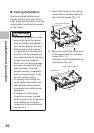
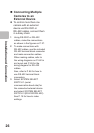
5 Align the tabs (A) sticking up
on the ceiling mount xture
(camera side) with ceiling mount
xture's (ceiling side) holes (B)
and slide in so they are held in
position.
Tuck the extra length of the
safety wire inside the ceiling
mount xture.
Ceiling mount fixture
Safety wire
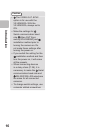
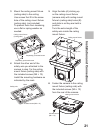
6 Fasten the camera to the ceiling
mount xture (ceiling side) with
the included screws (M5 × 12)
from the rear of the camera.
Ceiling mount fixture
Included screw
(M5 × 12)