


104
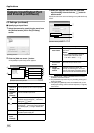
Applications
Note :
●
Before configuring the motion detection settings, it is
recommended that you complete the settings related to image
resolution, compression, and motion detection exclusion areas.
Otherwise, you may need to adjust the sensitivity level in the
motion detection settings again when you change the picture
quality and set the exclusion areas at a later date.
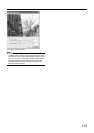
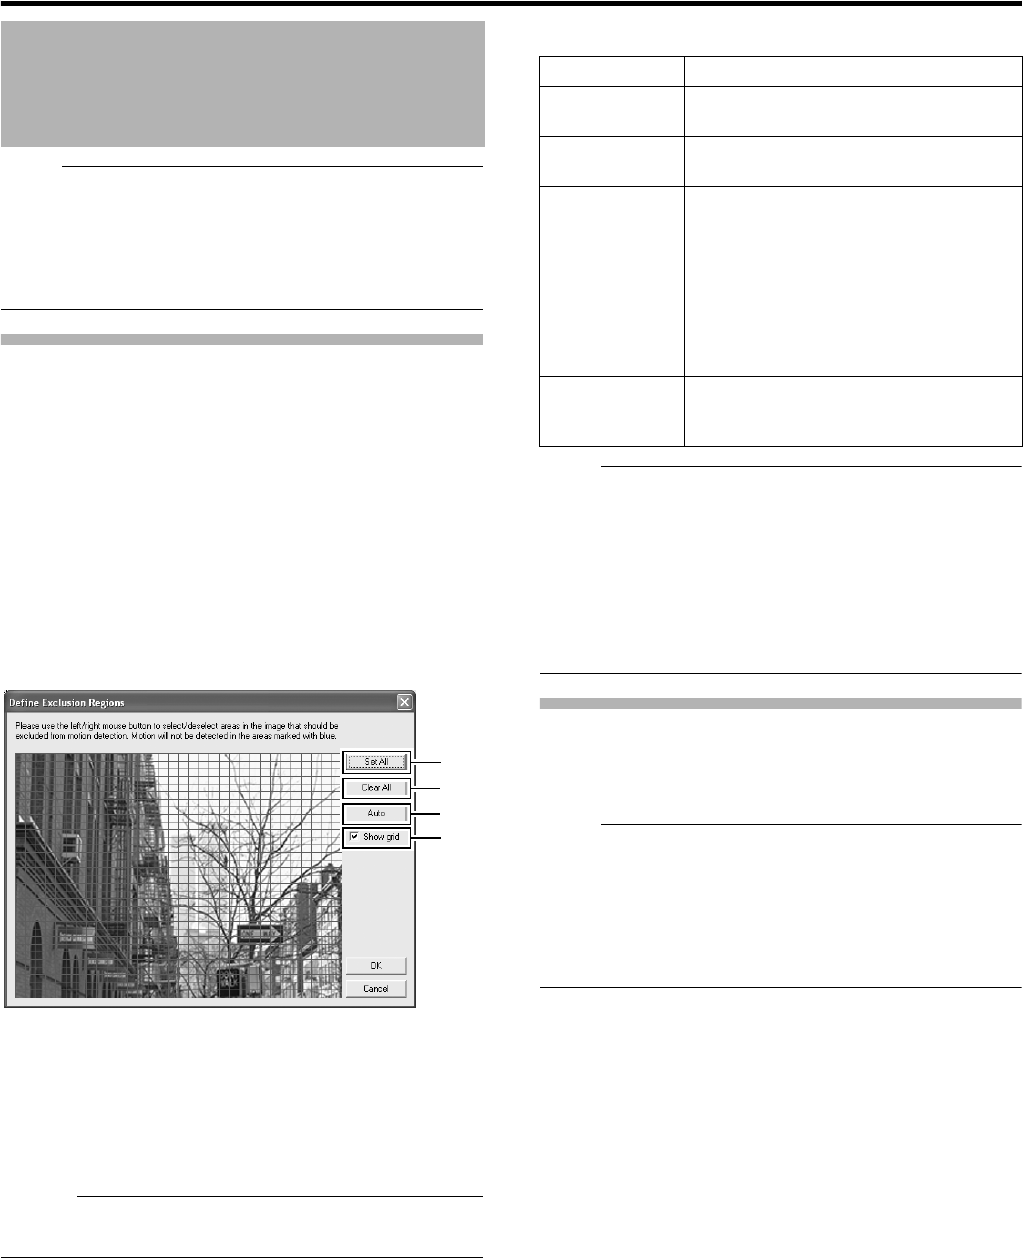
Defining Motion Detection Exclusion
Regions
You can specify specific areas to be excluded from motion detection
to prevent the detection of irrelevant motion, such as trees swaying
in the wind or cars that drive past continuously in the background.
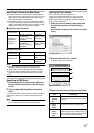
1 Select a camera from the [Device Manager] on
the [Camera Recording Administator] screen,
and click [Exclude Regions...] in [Settings...]
●
If the [Show Grid] check box is selected, the preview
screen appears, which is divided into small areas by a
grid. Areas highlighted in blue indicate the exclusion
areas.
2 To select an area, click and drag the mouse
pointer to move the grid on the screen
●
Selected areas are highlighted in blue.
Memo :
●
To clear the exclusion areas, right click and drag the mouse
pointer to move the grid.
Ⅵ Setting Buttons and Check Boxes
Note :
●
Note that when motion detection is set at short intervals, the
number of alarms may increase and a longer search time may
be required during playback.
●
When a camera is connected, flickers such as those of a
fluorescent light may cause a false motion detection. In this
case, set the camera to flickerless.
●
Noises in the camera image may also trigger a false detection.
Set the camera to prevent false detection even when the ACG
function is enabled, such as during nighttime.
Specifying Motion Detection.
Motion detection enables you to specify the timing to transfer
images from the camera, generate alerts, and trigger external
outputs (lights or sirens).
Note :
●
This feature is essential to the system’s operation. In order to
avoid unnecessary alerts during application, it is recommended
that you specify the settings for each camera carefully.
Depending on the physical location where the camera is
installed, it may be necessary to perform tests and adjustments
of the settings under different conditions (time of the day,
weather such as windiness, etc.).
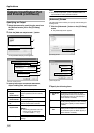
1 Select a camera from [Device Manager] on the
[Camera Recording Administator] screen, and
click the [Motion Detection..] button in
[Settings...] to open [Adjust Motion Detection]
2 Specify [Noise Sensitivity] and [Motion
Sensitivity]
●
The [Noise Sensitivity] slider is used to determine the level
of change in the image pixel that is to be recognized as
motion. The
A
High
B
setting recognizes minute changes in
the pixel as motion. Areas in the image that have changed
when compared with the previous image are highlighted
(default color is green).
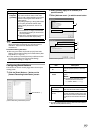
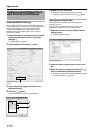
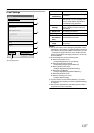
Motion Settings
A
B
C
D
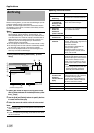
[Exclude Regions...] Screen
Item Description
A Set All
Sets all sections in the grid on the preview
image as exclusion areas.
B Clear All
Clears all sections in the grid on the preview
image that are specified as exclusion areas.
C Auto
Click this button to automatically detect areas
with insignificant image changes (noises)
that are not to be detected as
A
motion
B
, and
mark such areas to exclude them from
motion detection. As a large number of
images need to be analyzed during the
marking operation, it may take a while to
complete after you have clicked the [Auto]
button.
D Show Grid
Select this check box to enable the display of
grids on the preview image. The default
setting is [Show Grid].