


E4
Using Easy Panorama (Shooting and Playing back)
Reference Section
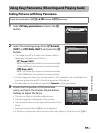
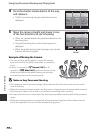
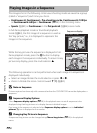
4 Press the shutter-release button all the way,
and release it.
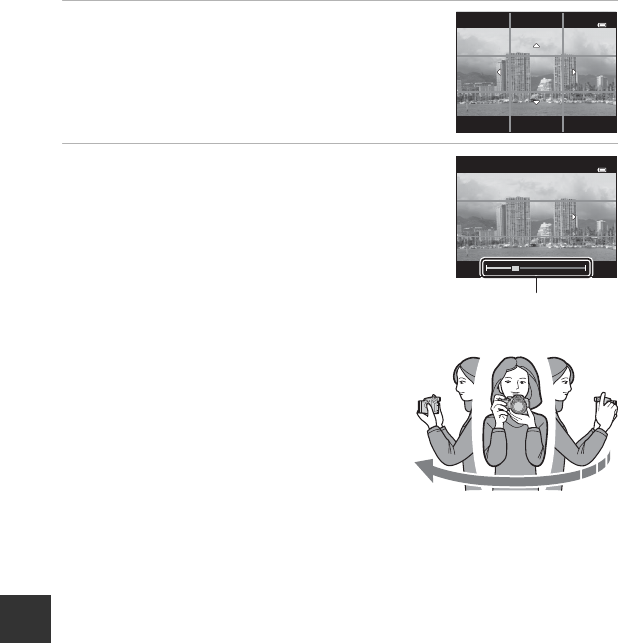
• The I icons showing the panorama direction are
displayed.
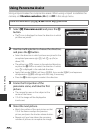
5 Move the camera straight and slowly in one
of the four directions to start shooting.
• When the camera detects the panorama direction, the
shooting starts.
• The guide showing the current shooting point is
displayed.
• When the guide showing the shooting point reaches
the end, the shooting ends.
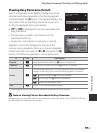
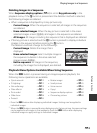
Example of Moving the Camera
• The user, without shifting position, moves the camera,
from end to end of the guide, horizontally or vertically in
an arc.
• If about 15 seconds (in
W Normal (180°)) or 30
seconds (in
X Wide (360°)) pass from the start of the
shooting, and before the guide showing the shooting
point reaches the end, the shooting ends.
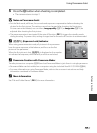
B Notes on Easy Panorama Shooting
• The image area seen in the saved image will be narrower than that seen on the monitor at the
time of shooting.
• When the camera movement speed is too fast, there is a large amount of camera shake or there is
little change in subject such as wall or in the dark, the shooting ends in an error.
• Panorama pictures are not saved when the shooting stops before reaching half of the panorama
range.
• When the shooting reaches more than half of the panorama range but finishes before the end
point, the range that is not shot will be recorded as a gray area.
Guide