E21
Connecting the Camera to a Printer (Direct Print)
Reference Section
Printing Multiple Images
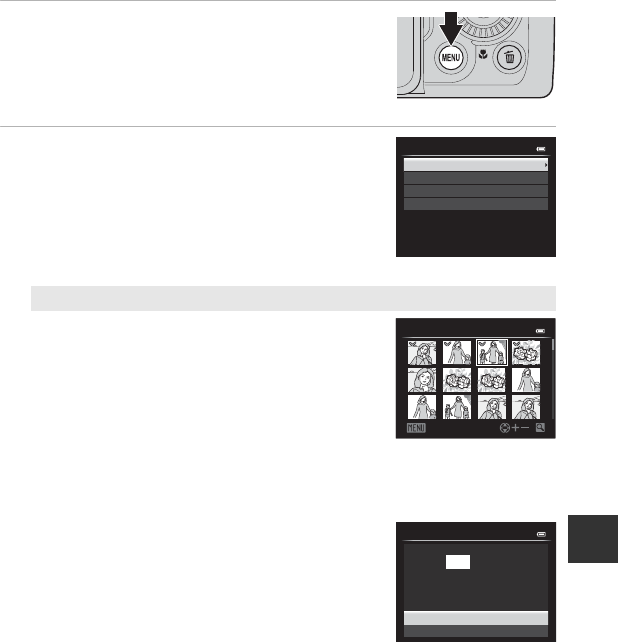
After connecting the camera to the printer correctly (E19), print pictures by
following the procedure below.
1 When the Print selection screen is displayed,
press the d button.
• To exit the print menu, press the d button.
2 Choose Print selection, Print all images or
DPOF printing and press the k button.
• Choose Paper size and press the k button to set the
paper size (E23).
To prioritize the printer settings, select Default.
Print selection
Choose the pictures (up to a maximum of 99) and
number of copies (up to 9 per picture).
• Press the multi selector J or K to choose the
pictures, and press H or I to set the number
of copies for each.
• Pictures selected for printing can be
recognized by the check mark icon and the
numeral indicating the number of copies to be
printed. If the numeral is set to 0, the print selection is cancelled.
• Rotate the zoom control toward g (i) to switch to full-frame playback mode,
or f (h) to switch to 12-thumbnail display.
• Press the k button when setting is complete.
• When the menu shown on the right is
displayed, choose Start print and press the
k button to start printing.
Paper size
DPOF printing
Print all images
Print selection
Print menu
Back
Print selection
111 11 3223
Cancel
Start print
10 prints
Print selection
