


62
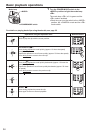
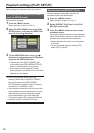
2) Select [YES] on the confirmation screen
to attach an index.
•
The point in the clip at which the index
will actually be attached will be accurate
to within an error of 0.5 seconds.
•
To delete the index, select
[INDEX]
[YES] in step
3
before
performing the following.
1) Select the clip to play, tilt the
OPERATION lever in the <
>
direction, and pause the clip.
2) Since tilting the OPERATION lever
in the <
>< > directions moves the
pointer between the points where
indexes are attached, move the
pointer to the index to be deleted, and
push the OPERATION lever.
3) Select [YES] on the confirmation
screen.
[NO]:
Returns to the previous screen.
• It is not possible to add indexes to clips shot
using a consumer camcorder model.
• It is not possible to adjust the volume during
index playback.
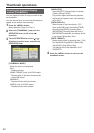
[CLIP PROTECT] (only in AVCHD mode):
[YES]:
Protects selected clips. ([
] mark will be
displayed.)
•
Cancels protection when the protected
clip is selected. ([
] mark will
disappear.)
Formatting the memory card will delete all
clips even if they are protected.
[NO]:
Returns to the previous screen.
4
Press the <MENU> button to return to the
thumbnail screen.
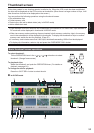
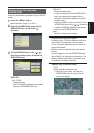
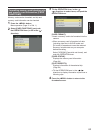
Repairing clips (only in DV mode)
Repair clips on which the defective clip indicator
[
X
] (Yellow) is displayed on the thumbnail screen.
•
Clips with the defective clip indicator [
X
] (Red)
cannot be repaired.
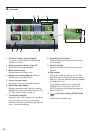
1
Press the <MENU> button on the thumbnail
screen.
The thumbnail menu will be displayed.
2
Select [REPAIR] in the [OPERATION] item on
the thumbnail menu and press [YES].
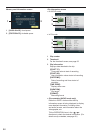
3
Select a clip to repair using the OPERATION
lever.
4
Press the <EXEC> button.
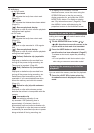
5
Select [YES] on the confirmation screen,
and push the OPERATION lever.
Clip repair will be performed.
•
When shot mark has been set on the clip, the
setting is canceled.
• Repair defective clips with this camera before
moving them to a computer. Defective clips
cannot be repaired once they are moved to
a computer and written back on the memory
card.