


10
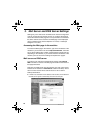
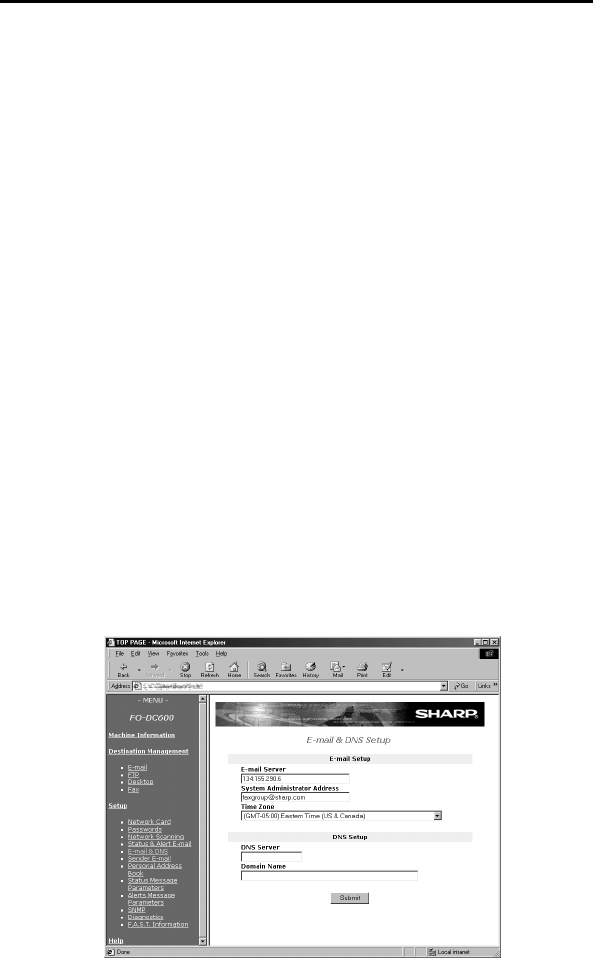
3. Mail Server and DNS Server Settings
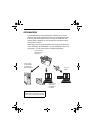
Settings for your E-mail server and DNS server must be configured in
order to use the network scanner function. To configure the settings,
access the machine's Web page from a computer that is connected to
the same network as the machine. The Web page can be displayed
with your Web browser (Internet Explorer 4.0 or later, or Netscape
Navigator 4.0 or later).
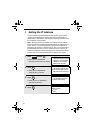
Accessing the Web page in the machine
To access the Web page in the machine, type in the IP address of the
machine in your browser in the format http://XXX.XXX.X.X, where the
X’s are the IP address (the number of digits between periods will vary
depending on the address). If you need to check the IP address of the
machine, print out the network settings as explained on page 9.
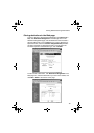
Mail server and DNS server
To configure your mail server and DNS server settings, click
E-mail &
DNS
in the menu at the left of the Web page and enter the information in
the appropriate boxes.
Note that your DNS server must be entered if you enter a host name
instead of an IP address in E-mail Server under E-mail Setup. This is
also true if host names will be used for Scan to FTP or Scan to
Desktop destinations.
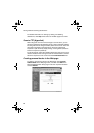
♦ If “DHCP” was selected for the IP address of the machine, the IP address of
the DNS server appears automatically and cannot be changed.