


Mail Server and DNS Server Settings
11
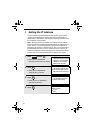
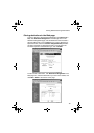
Setting Passwords
Passwords can be set to restrict Web page access and protect
settings. An administrator password and a user password can be set.
When the Web page is accessed with the administrator password, all
settings can be configured. When the Web page is accessed with the
user password, destinations in the Scanner Destination Management
menu can be stored, deleted, and edited; however, settings in the
Setup menu cannot be configured
(with the exception of “Sender E-mail”
and “Personal Address Book”)
.
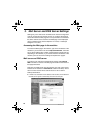
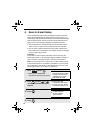
To enable password protection, click Passwords in the Web page
menu and select the “Enable Password Protection of this Web
Site” checkbox. The passwords for “User” and “admin” are both
initially set to “Sharp”. If you wish to change a password, enter
“Sharp” in Old Admin Password, and then enter the new password
under User Password or Admin Password. A password must
consist of alphanumeric characters and be no more than 10
characters long. Passwords are case sensitive.
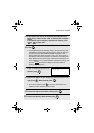
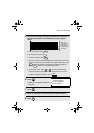
When you are finished, click Submit to store the new settings and
then turn the machine power off and then back on. The next time you
attempt to access the Web page, you will be prompted for the
password. For the User name, enter “user” if you are accessing the
page as a user, or “admin” if you are accessing the page as an
administrator.
For more information on setting passwords, click Help at the bottom of
the Web page menu.
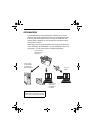
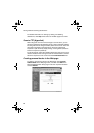
Network Scanning and Sender E-mail settings
The network scanning settings allow you to select the method for
assigning a file name to a scanned image and enter a subject for Scan to
E-mail (the subject can also be entered from the operation panel of the
machine as explained in Scan to E-mail Setup on page 16).
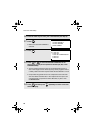
Click Network Scanning in the menu and then configure the settings
as needed. When finished, be sure to click Submit to store the new
settings.
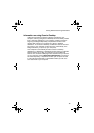
To enter the sender name and sender e-mail address that appear on
e-mail that you send, click Sender E-mail. The sender information
can be entered separately for each personal book and for the
COMMON book.
For detailed information on all the settings in the Web page, click
Help
.