SonicWALL SRA 1200/4200 Getting Started Guide Page 17
Setting Your NetExtender Address Range
The NetExtender IP range defines the IP address pool from
which addresses will be assigned to remote users during
NetExtender sessions. The range needs to be large enough to
accommodate the maximum number of concurrent NetExtender
users you wish to support.
The range should fall within the same subnet as the interface to
which the SonicWALL SRA appliance is connected, and in
cases where there are other hosts on the same segment as the
SonicWALL SRA appliance, it must not overlap or collide with
any assigned addresses. You can determine the correct subnet
based on your network scenario selection:
To set your NetExtender address range in the management
interface:
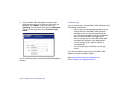
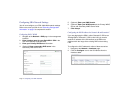
1. Navigate to the NetExtender > Client Settings page.
2. Enter an address range for your clients in the Client
Address Range Begin and Client Address Range End
fields.
If you do not have enough available addresses to support your
desired number of concurrent NetExtender users, you may use
a new subnet for NetExtender. This condition may occur if your
existing DMZ or LAN is configured in NAT mode with a small
subnet space, such as 255.255.255.224, or more commonly if
your DMZ or LAN is configured in Transparent mode and you
have a limited number of public addresses from your ISP. In
either case, you may assign a new, unallocated IP range to
NetExtender (such as 192.168.10.100 to 192.168.10.200) and
configure a route to this range on your gateway appliance.
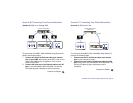
For example, if your current Transparent range is 67.115.118.75
through 67.115.118.80, and you wish to support 50 concurrent
NetExtender clients, configure your SRA X0 interface with an
available IP address in the Transparent range, such as
67.115.118.80, and configure your NetExtender range as
192.168.10.100 to 192.168.10.200. Then, on your gateway
device, configure a static route to 192.168.10.0/255.255.255.0
using 67.115.118.80.
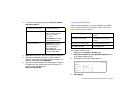
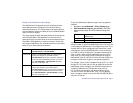
Scenario A Use the default NetExtender range:
192.168.200.100 to 192.168.200.200
Scenario B Select a range that falls within your existing DMZ
subnet. For example, if your DMZ uses the
192.168.50.0/24 subnet, and you want to support up
to 30 concurrent NetExtender sessions, you could
use 192.168.50.220 to 192.168.50.249, providing
they are not already in use.
Scenario C Select a range that falls within your existing LAN
subnet. For example, if your LAN uses the
192.168.168.0/24 subnet, and you want to support up
to 10 concurrent NetExtender sessions, you could
use 192.168.168.240 to 192.168.168.249, providing
they are not already in use.
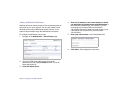
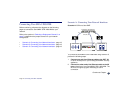
Scenario A 192.168.200.100 to 192.168.200.200
(default range)
Scenario B An unused range within your DMZ subnet
Scenario C An unused range within your LAN subnet


