


SonicWALL SRA 1200/4200 Getting Started Guide Page 43
Uploading a New SRA SSL VPN Image
Note: SonicWALL SRA 4200/1200 appliances do not support
downgrading an image and using the configuration
settings file from a higher version. If you are
downgrading to a previous version of a SRA SSL VPN
image, you must select Uploaded Firmware with
Factory Defaults – New! You can then import a
settings file saved from the previous version or
reconfigure manually.
To upload new firmware on the appliance:
1. Download the SRA SSL VPN image file from
www.mysonicwall.com and save it to a location on your
local computer.
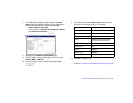
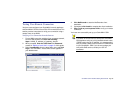
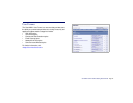
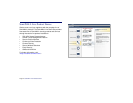
2. Select Upload New Firmware from the System >
Settings page. Browse to the location where you saved the
SRA SSL VPN image file, select the file, and click the
Upload button. The upload process can take up to one
minute.
On a SonicWALL SRA 4200/1200, you are ready to reboot your
appliance with the new SRA SSL VPN image.
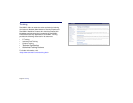
Do one of the following:
1. To reboot the image with current preferences, click the boot
icon for the following entry:
Uploaded Firmware – New!
2. To reboot the image with factory default settings, click the
boot icon for the following entry:
Uploaded Firmware with Factory Defaults – New!
Note: Be sure to save a backup of your current configuration
settings to your local machine before rebooting the
SonicWALL SSL VPN appliance with factory default
settings, as described in the previous “Saving a Backup
Copy of Your Configuration Settings” section.
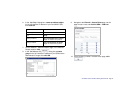
3. A warning message dialog is displayed saying Are you
sure you wish to boot this firmware? Click OK to
proceed. After clicking OK, do not power off the device
while the image is being uploaded to the flash memory.
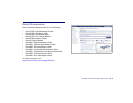
4. After successfully uploading the image to your SonicWALL
SSL VPN appliance, the login screen is displayed. The
updated image information is displayed on the System >
Settings page.