


37 (GB)
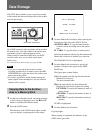
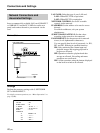
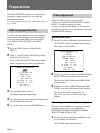
<ACTIVITY DETECTION SEARCH>
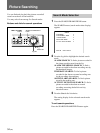
SEARCH FROM : ALARM /CHANNEL: --
START:
12-20-00 08:00
END:
12-20-00 10:00
ACTIVITY SENSOR c
PREVIEW c
VIEW c
MOVE/CHNG:JOG SET:SHUTTLE
6 Set the starting date and time of the period for
searching at START.
7 Set the ending date and time of the period for
searching at END.
8 To set the activity detection sensor, highlight
ACTIVITY SENSOR and turn the Shuttle dial
clockwise.
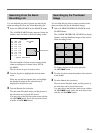
The sensor marks are displayed on a 10 × 8 grid on
the monitor, and the top left mark flashes.
You may set the sensing points and the sensitivity.
For the setting procedure, see “Setting the activity
detection sensor” on page 25(GB).
To preview the thumbnail images
Highlight PREVIEW and turn the Shuttle dial
clockwise.
Each time you turn the Shuttle dial clockwise, the unit
searches for events recorded during the specified
period and displays in sequence thumbnail images of
the pictures for which activity was detected in the
preview zone.
To display a picture full-screen
Highlight VIEW and turn the Shuttle dial clockwise.
The unit enters Playback mode with full-screen
display, starting from the picture displayed in the
preview zone as a thumbnail image.
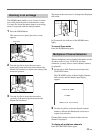
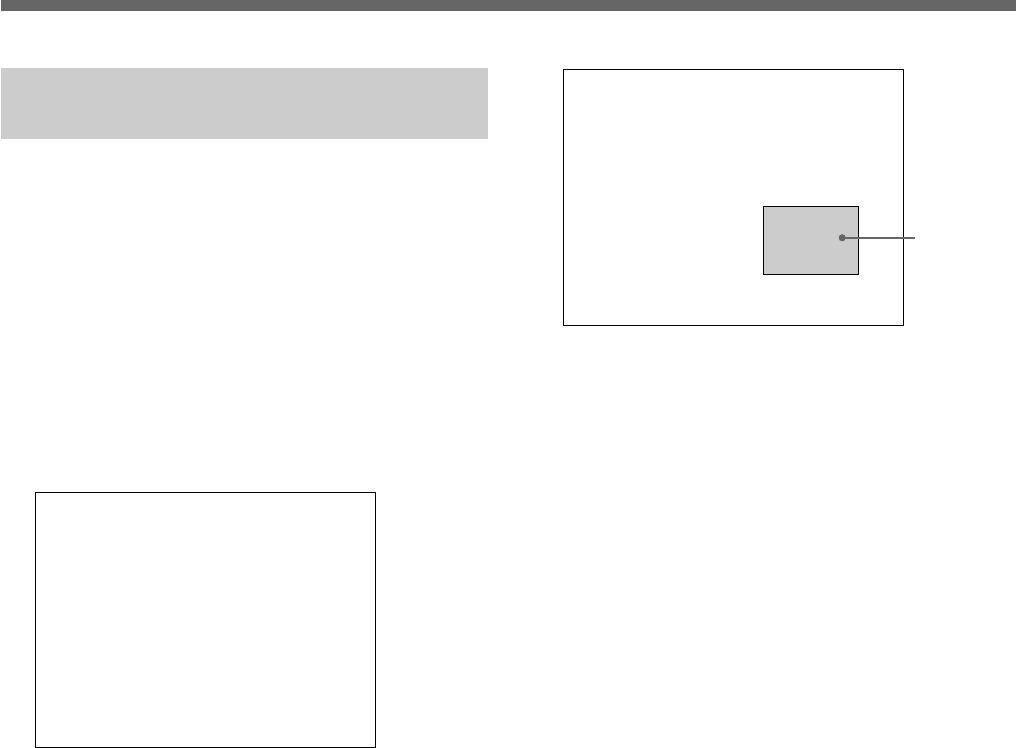
Searching using the Activity
Detection Sensor
The built-in activity detection sensor permits you to
find and play back the picture for which activity
(change in luminance) has been detected within the
specified period.
You can search both the normal and alarm recording
areas.
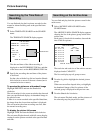
1 Select ACTIVITY DETECTION SEARCH on the
SEARCH menu.
The ACTIVITY DETECTION SEARCH display
appears.
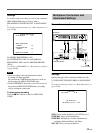
<ACTIVITY DETECTION SEARCH>
SEARCH FROM : ALARM
START : 12-20-00 08:00
END : 12-20-00 10:00
CHANNEL : --
START PREVIEW c SEARCHING
MOVE:JOG SELECT:SHUTTLE
2 Turn the Shuttle dial clockwise to specify the area
to search on the SEARCH FROM line.
The current setting flashes.
3 Select the area(s) with the Jog dial and turn the
Shuttle dial clockwise to finalize your selection.
ALARM: To search the alarm recording area only
NORMAL: To search the normal recording area
only
ALARM & NORMAL: To search both the alarm
and normal recording areas. The unit searches
the alarm recording area first, then the normal
recording area.
4 If a multiplexer of the specified type is in use,
specify the channel on the CHANNEL line.
5 Highlight START PREVIEW and turn the Shuttle
dial clockwise.
The display changes and the thumbnail image of
the oldest picture recorded in the specified area(s)
is displayed in the preview zone.
Preview zone