


40 (GB)
Connections and Settings
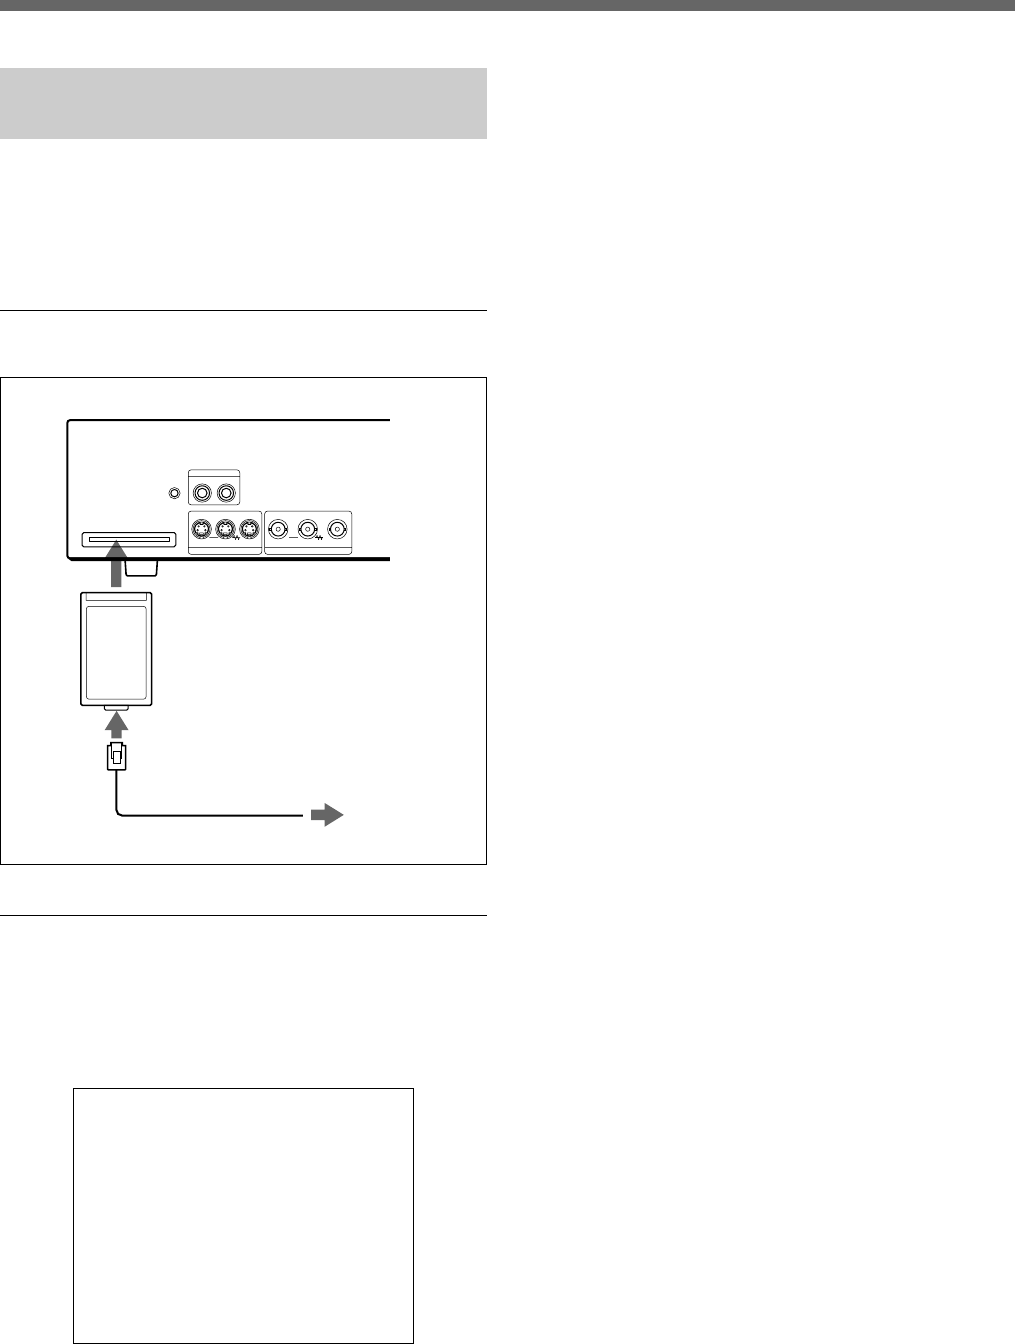
Network Connections and
Associated Settings
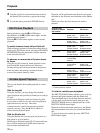
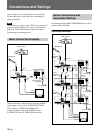
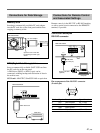
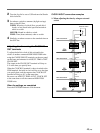
Insert a commercially available LAN card (10BASE-T
or 100BASE-T) into the PC CARD slot on the rear
panel, and connect the unit to your network via the
card.
Connection
Settings
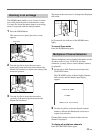
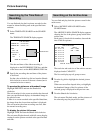
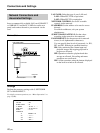
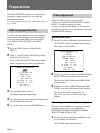
Perform the necessary settings with 5. NETWORK
SET of MAIN MENU 2.
For details on menu operations, see “Menu Operations” on
page 17(GB).
<NETWORK SET>
LAN CARD : LAN1
NETWORK CONTROL : ON
IP ADDRESS : 192.168. 0. 1
SUBNET MASK : 255.255.255.000
GATEWAY : 0.0.0.0
PASSWORD SET
ID PASSWORD (4-8)
ID1 : 1111----
ID2 : 2222----
ID3 : 3333----
LAN CARD: Select the type of your LAN card.
LAN1: FEtherPCC-TXD or equivalent
LAN2: FEtherPCC-TD or equivalent
NETWORK CONTROL: Set to ON to enable
controls via the network.
IP ADDRESS: Set the address to be used to access
this unit.
For effective addresses, ask your system
administrator.
SUBNET MASK/GATEWAY: Set the values
according to the network to be connected.
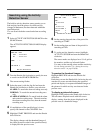
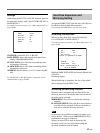
PASSWORD SET: Set the passwords for network
access (4 to 8 alphanumeric characters).
You can specify three levels of passwords, i.e. ID1,
ID2, and ID3, differing in operable functions.
ID1: Only monitoring the camera input and
playback images and stopping playback in
progress are allowed.
ID2: Operations related to playback and data
storage are allowed. Recording and menu
operations are not allowed.
ID3: All the operations using the buttons displayed
on the browser window are allowed.
Ethernet cable
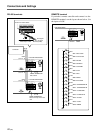
PC CARD
ETHERNET
PC CARD
MIC
AUDIO
IN
IN
OUT
OUTLOOP OUT IN OUTLOOP OUT
S-VIDEO VIDEO
HSR-X200/X200P
LAN card