21
Menus
The selected page is displayed.
To change the displayed page
1 Check that the pointer is located at the left of the page
number then push on the menu control knob.
The pointer changes to a flashing question mark.
2 Rotate the menu control knob to flip through the
pages, and push on the knob when the desired page
is displayed.
The question mark will change back to the pointer, and
operations with the displayed page are enabled.
To return to the TOP MENU screen
Align the pointer with “TOP” at the top right of the menu
page then push on the menu control knob.
To set the Menu Items
If a question mark is flashing at the left of the page number,
push on the menu control knob to change it to the pointer.
Operation on the displayed page is enabled.
1 Align the pointer with the desired item, then push on
the menu control knob.
The pointer will change to a flashing question mark.
2 Rotate the menu control knob to change the setting
value.
When the knob is rotated quickly, the values will change
quickly; when rotated slowly, the values will change slowly.
To reset a changed value
If you press the STATUS/ CANCEL switch toward
CANCEL before pushing on the menu control knob, the
setting will be returned to its previous value.
To interrupt settings
Set the DISPLAY/MENU switch to OFF to turn off the
menu screen display.
The setting operation can be restarted by setting the
DISPLAY/MENU switch back to MENU.
3 Push on the menu control knob.
The question mark will change back to the pointer, and the
new setting will be registered.
4 To change other setting items on the same menu
page, repeat steps 1 through 3.
To specify a character string
When you press the menu control knob with the pointer
pointing to an item for which a character string, such as a file
ID, is to be specified, a cursor and the list of selectable
characters are displayed.
The displayed cursor can be moved by rotating the menu
control knob.
1 Set the cursor to the position where you wish enter a
character, then push on the menu control knob.
Another cursor appears on the character list.
2 Set the cursor to the character to be entered and push
on the menu control knob.
Repeat steps 1 and 2.
• By selecting INS on the line below the character list, you
can enter a space at the cursor position.
• Selecting DEL deletes the character at the cursor
position.
• You can return to step 1 without changing the character
by selecting RET.
• If you enter the permitted maximum number of
characters (up to the stop mark at the right end of the
line), the cursor moves to ESC on the line below the
character list.
3 Select END and push on the menu control knob.
The new string you have set is registered.
To restore the previous string, select ESC and push on
the menu control knob.
To end menu operations
Set the DISPLAY/MENU switch to OFF.
Editing the USER Menu
You can select desired pages and items from the
OPERATION, PAINT, MAINTENANCE, FILE, and
DIAGNOSIS menus and register them to the USER menu.
If you specify pages or items frequently used for the USER
menu, you can easily call and use them.
The following pages are included on the factory-set USER
menu:
CONTENTS 00 TOP
01.<VF DISPLAY>
02.<'!'IND>
03.<VF MARKER>
04.<VF DETAIL>
05.<FOCUS ASSIST>
06.<ZEBRA>
07.<CURSOR>
08.<VF OUT>
09.<SWITCH ASSIGN1>
10.<SWITCH ASSIGN2>
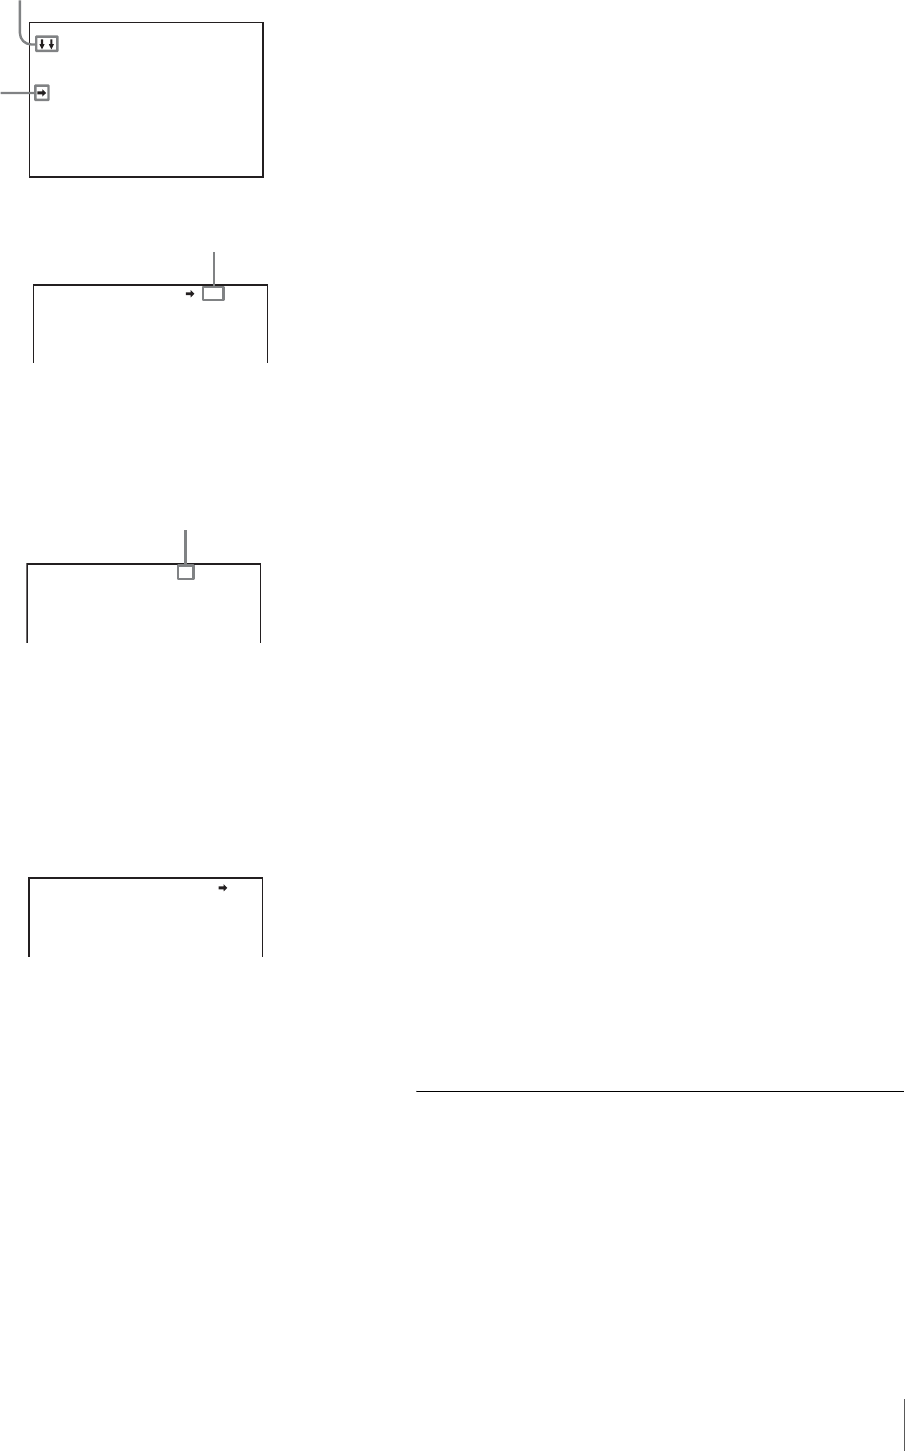
If the screen can be scrolled, arrows will
indicate the direction for scrolling.
Pointer
<VF DETAIL> 04 TOP
VF DETAIL : ON 25%
CRISP : 0
FREQUENCY: 9M
FAT MODE : OFF
Page number
<VF DETAIL> ? 04 TOP
VF DETAIL : ON 25%
CRISP : 0
FREQUENCY: 9M
FAT MODE : OFF
flash
<VF DETAIL> 04 TOP
VF DETAIL : ON 25%
CRISP : 0
FREQUENCY: 9M
FAT MODE : OFF


