


Administrating the Camera
Basic Operations of Administrator Menu
24
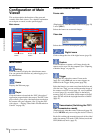
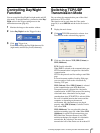
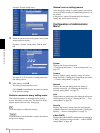
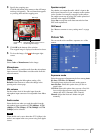
Example: System setting menu
4
Select the tab above the setting menu, and set each
setting option in the tab.
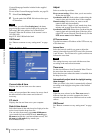
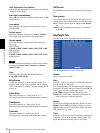
Example: “System” setting menu “Date & time”
tab
See page 25 to 52 for details of setting menu tabs
and setting options.
5
After setting, click OK.
The setting contents become active.
Click Cancel to invalidate the set values and return
to the previous settings.
Buttons common to every setting menu
The following buttons are displayed on the setting
menus where they are necessary. The functions of the
buttons are the same on every setting page.
Click this button to validate the settings.
Click this button to invalidate the set values and return to
the previous settings.
General note on setting menus
After changing a setting on a setting menu, wait at least
10 seconds before turning off immediately the power of
the camera.
If the power is turned off immediately, the changed
setting may not be stored correctly.
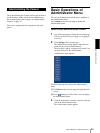
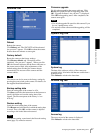
Configuration of Administrator
Menu
System
Displays the System setting menu.
(“Configuring the System — System setting menu” on
page 25).
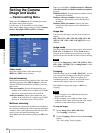
Camera
Displays Camera setting menu for setting of camera
image and audio. (“Setting the Camera Image and Audio
— Camera setting Menu” on page 28)
Network
Displays the network setting menu for setting of
network connection. (“Configuring the Network —
Network setting Menu” on page 32)
User
Displays the user setting menu for setting the user name
and the password to log in. (“Setting the User — User
setting Menu” on page 36)
Security
Displays the security setting menu for specifying the
computer allowed to connect to the camera. (“Setting the
Security — Security setting Menu” on page 37)
e-Mail (SMTP)
Displays the e-Mail (SMTP) setting menu for sending an
e-Mail. (“Sending an Image via mail — e-Mail (SMTP)
setting Menu” on page 38)