


Others
Using the SNC audio upload tool — Transmitting Audio to Camera
57
Connecting the Camera to the
Computer
1
Connect a speaker to the line output jack on the
camera.
2
Connect a microphone to the microphone input jack
on the computer.
Note
If the microphone input jack of the computer is not set
correctly, no sound is transmitted from the computer and
nothing is output from the speaker connected to the
camera.
Set the microphone input jack from the control panel of
Windows.
On Windows 2000
1 Select Sounds and Multimedia from Control Panel.
2 Click Volume in the Sound Recording section on
the Audio tab.
The Recording Control window opens
3 Check Select in the Microphone section.
On Windows XP
1 Select Sounds and Audio Device from Control
Panel.
2 Click Volume in the Sound Recording section on
the Audio tab.
The Recording Control window opens.
3 Check Select in the Microphone section.
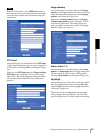
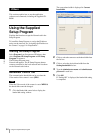
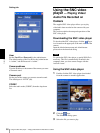
Using the SNC audio upload tool
When you start the SNC audio upload tool, the
following window is displayed.
Menu tab
N (start)/x(stop)
Click N (start) to start sound transmission. The
transmission speed is displayed in the Bitrate box during
transmission. You can adjust the microphone volume
and enable/disable the muting, if necessary.
To stop the sound transmission, click x(stop).
Note
If you change IP Address, Proxy Port, CODEC on the
Setting tab during the sound transmission, the changed
settings will be effective after the transmission.
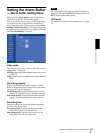
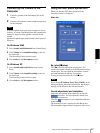
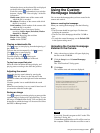
Sound adjustment and indicators
Adjust the microphone input volume by moving the
slider bar. You can adjust the volume even
during the transmission.
Click the microphone icon to enable/disenable the
sound muting.
The transmission rate is displayed in the Bitrate box.
The microphone input volume is displayed at the Level.