


Others
Assigning the IP Address to the Camera Using ARP Commands
61
Note
Do not turn off the camera until the camera is
rebooted after uploading the homepage file.
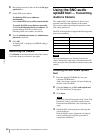
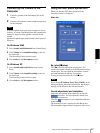
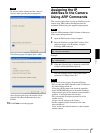
The following page will appear after a while.
After displaying this page, the camera will be
adjusted and rebooted automatically in two
minutes.
13
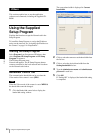
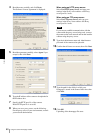
Click Finish to exit the program.
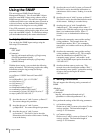
Assigning the IP
Address to the Camera
Using ARP Commands
This section explains how to assign an IP address to the
camera using ARP (Address Resolution Protocol)
commands without using the supplied setup program.
Note
Enter the ARP commands within 5 minutes of the power
of the camera being turned on.
1
Open the DOS window on the computer.
2
Enter the IP address and the MAC address of the
camera to assign a new IP address, using the
following ARP commands.
Example:
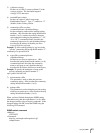
3
When the following line is displayed on the DOS
window, hold down Ctrl and press C.
You will normally receive a reply after about 5
repetitions of "Request time out."
Note
If you do not receive a reply, check the following:
– Did you enter the ARP commands within 5 minutes of
the camera being turned on?
If not, turn off the camera and restart the operation.
– Is the NETWORK indicator on the camera flashing?
If the indicator goes off, the network connection has a
problem. Connect the network correctly.
– Did you enter the IP address previously used for
another device?
Assign a new IP address to the camera.
– Do the computer and the camera have the same
network address?
If not, set the same network address on the computer
and the camera.
arp -s <Camera's IP address> <Camera's MAC address>
ping -t <Camera's IP address>
arp -s 192.168.0.100 08-00-46-21-00-00
ping -t 192.168.0.100
Reply from 192.168.0.100:bytes=32 time...