


Administrating the Camera
Setting the Camera Image and Audio — Camera setting Menu
28
Setting the Camera
Image and Audio
— Camera setting Menu
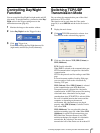
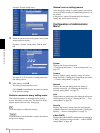
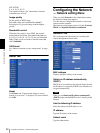
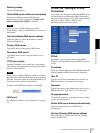
When you click Camera on the Administrator menu,
the Camera setting menu appears.
Use this menu to set the functions of the camera.
The Camera setting menu consists of 6 tabs: Common,
Picture, Day/Night, MPEG4, JPEG and Reset.
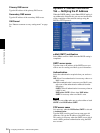
Common Tab
Video mode
Select the output format of the camera image.
MPEG4 or JPEG can be selected.
Unicast streaming
Specify the transmission port number of the video data
and audio data used when UDP (Unicast) is selected
with the TCP/UDP transmission switching icon in the
main viewer
Video port number: Specify the transmission port
number of the video data. It is initially set to 50000.
Specify an even number from 1024 to 65534.
Audio port number: Specify the transmission port
number of the audio data. It is initially set to 50002.
Specify an even number from 1024 to 65534.
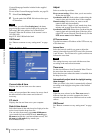
Multicast streaming
Set whether the camera uses the Multicast streaming or
not. It reduces sending load on the camera by making the
computer of the same segment network (not above the
router) receive the same transmitting data.
Select On to allow the multicast sending and Off not to
allow.
When you select On, set Multicast address, Multicast
video port number and Multicast audio port number
properly.
Multicast address: Type the multicast address used on
the Multicast streaming.
Multicast video port number: Specify the video
transmission port number used on the Multicast
streaming.
Multicast audio port number: Specify the audio
transmission port number used on the Multicast
streaming.
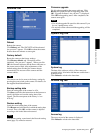
Image size
You can select the image size sent from the network
camera.
640 × 480 (VGA), 480 × 360, 384 × 288, 320 × 240
(QVGA), 256 × 192 or 160 × 120 (QQVGA) can be
selected.
Image mode
The image output from the camera can be selected from
Field mode or Frame mode. When Frame mode is
selected, level resolution goes up. However, an edge
portion will become notched if what is taken is moving.
Notes
If you set the Image size to 320 × 240 (QVGA), 256 ×
192 or 160 × 120 (QQVGA), the Image mode is fixed
in the Field mode.
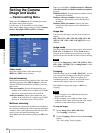
Cropping
When the image size is set to 640 × 480 (VGA), you can
crop a portion of the image and display the cropped
image on the computer. With the cropping, the
transmitting data size, and thus, the network load is
reduced and a higher frame rate is obtained.
Select On for cropping the image, or Off for no
cropping.
Notes
• When Cropping is set to On, Motion detection
function does not work.
• While Cropping is set to On, the image of the
composite video signal output from the video output
connector of the camera may be distorted.
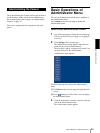
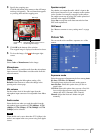
To crop an image
1
Set the Image size to 640 × 480(VGA).
The Cropping is displayed.
2
Set the Cropping to On and click the Area setting
button.
The “Area setting” display appears.