


123
1
2
3
4
5
7
8
9
Preliminary Notes and
Legal Information
Contents: Basic
Operations
Camera Basics
Auto Mode/Hybrid
Auto Mode
Other Shooting
Modes
Playback Mode
Setting Menu
Accessories
Appendix
Index
Basic Guide
P Mode
Cover
Advanced Guide
6
Wi-Fi Functions
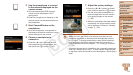
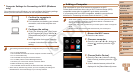
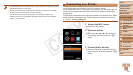
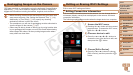
5 Choose a computer to connect
to.
Choose the computer to connect to,
following steps 7 – 8 in “Adding a
Computer” (=
121). The computer is
now added to the list.
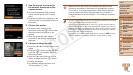
•For information on the access point’s encryption key, refer to the body of the
access point or its user manual.
•Up to 16 access points will be displayed. If no access points are detected,
choose [Manual Settings] in step 2 to manually set an access point. Follow
on-screen instructions and enter an SSID, security settings, and an encryption
key.
•When you use an access point that you have already connected to for
connecting to another device, [*] is displayed for the encryption key in step 3.
To use the same encryption key, press the <o><p> buttons to choose [Next],
and then press the <m> button.
•To add multiple computers, repeat the above procedures starting from step 1.
Using CameraWindow to Transfer Images to a
Computer
Use the computer (included software CameraWindow) to transfer images
from the camera to the computer.
•For details on how to use CameraWindow, see the Software Guide (=
19).
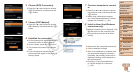
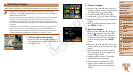
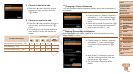
1 Display CameraWindow.
In Windows, click [Downloads Images
From Canon Camera using Canon
CameraWindow].
CameraWindow will be displayed.
On a Macintosh computer,
CameraWindow is automatically
displayed when a Wi-Fi connection is
established between the camera and
computer.
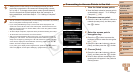
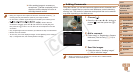
2 Import images.
Click [Import Images from Camera], and
then click [Import Untransferred Images].
Images are now saved to the Pictures
folder on the computer, in separate
folders named by date.
Click [OK] in the screen that is displayed
after image import is complete.
C OPY