


45
1
3
4
5
6
7
8
9
Preliminary Notes and
Legal Information
Contents: Basic
Operations
Camera Basics
Other Shooting
Modes
Playback Mode
Wi-Fi Functions
Setting Menu
Accessories
Appendix
Index
Basic Guide
P Mode
Cover
Advanced Guide
2
Auto Mode/Hybrid
Auto Mode
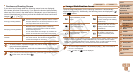
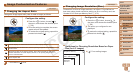
Checking and Editing Registered Information
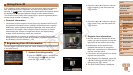
1 Access the [Check/Edit Info]
screen.
Following step 1 in “Registering Face ID
Information” (=
42), choose [Check/
Edit Info] and press the <m> button.
2 Choose a person to check or
edit.
Press the <o><p><q><r> buttons to
choose the person to check or edit, and
then press the <m> button.
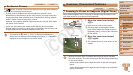
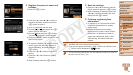
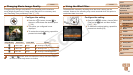
3 Check or edit the information as
needed.
To check a name or birthday, access
the [Edit Prole] screen by pressing the
<o><p> buttons and then pressing the
<m> button. On the screen displayed,
you can edit names or birthdays as
described in step 3 of “Registering Face
ID Information” (=
43).
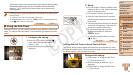
To check face information, press the
<o><p> buttons to choose [Face Info
List], and then press the <m> button. To
erase face information, press the <m>
button on the screen displayed, press
the <o><p><q><r> buttons to choose
the face information to erase, and then
press the <m> button. After [Erase?] is
displayed, press the <q><r> buttons to
choose [OK], and then press the <m>
button.
•Even if you change names in [Edit Prole], the names recorded in
previously shot images will remain the same.
•You can use the included software to edit registered names. Some characters
entered with the included software may not display on the camera, but will be
correctly recorded in images.
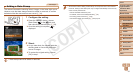
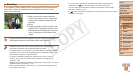
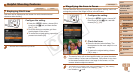
Overwriting and Adding Face Information
You can overwrite existing face information with new face info. You should
update face information regularly, especially with babies and children, as
their faces change quickly as they grow.
You can also add face information when all 5 face info slots have not been
lled.
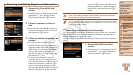
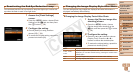
1 Access the [Add Face Info]
screen.
Following step 1 in “Registering Face ID
Information” (=
42), choose [Add Face
Info] and press the <m> button.
C OPY