


127
1
2
3
4
5
7
8
9
Preliminary Notes and
Legal Information
Contents: Basic
Operations
Camera Basics
Auto Mode/Hybrid
Auto Mode
Other Shooting
Modes
Playback Mode
Setting Menu
Accessories
Appendix
Index
Basic Guide
P Mode
Cover
Advanced Guide
6
Wi-Fi Functions
After sending images to a camera or
smartphone, [Transfer completed] will be
displayed, and the display will return to
the image transfer screen.
•Keep your ngers or other objects off the Wi-Fi transmitter-receiver (=
4).
Covering this may decrease the speed of your image transfers.
•On the screen, wireless signal strength is indicated by the following icons.
[
] high, [ ] medium, [ ] low, [ ] weak
•To disconnect from the camera, press the <n> button. After the
conrmation message, press the <q><r> buttons to choose [OK], and
then press the <m> button. You can also use the smartphone to end the
connection.
•Only images larger than the resolution you selected in step 3 will be resized.
•Movies cannot be resized.
•To send only one of the displayed images, choose [Resize] on the screen in
step 1, change the size, and choose [Send this image].
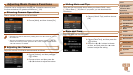
Adding Comments
Using the camera, you can add comments (alphanumeric characters and
symbols) to images that you send to email addresses, social networking
services, etc. The number of characters and symbols that can be entered
may differ depending on the Web service.
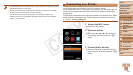
1 Choose [ ].
Press the <o><p><q><r> buttons to
choose [
], and then press the <m>
button.
2 Add a comment.
Follow step 3 in “Registering a Camera
Nickname (First time only)” (=
111) to
add a comment.
3 Send the images.
Follow the steps in “Sending Images”
(=
126) to send the image.
•When a comment is not entered, the comment set in CANON iMAGE
GATEWAY is automatically sent.
C OPY