Replacing Ink Cartridges 53
Removing and Installing Ink Cartridges
Be sure you have a new ink cartridge before you begin. Once you start replacing a
cartridge, you must complete all the steps in one session.
Caution:
Do not open ink cartridge packages until you are ready to install the ink. Cartridges are
vacuum packed to maintain reliability.
Leave the expended cartridge installed until you have obtained a replacement, or the ink
remaining in the print head nozzles may dry out. To ensure good results, use genuine
Epson ink cartridges and do not refill them. Other products may cause damage to your
printer not covered by Epson’s warranty.
1. Make sure the printer is turned on, the CD tray is not inserted, and the front
tray is in the paper (lower) position.
2. If an ink cartridge is expended, the LCD screen indicates which cartridge(s)
you need to replace. Press
OK.
If an ink cartridge is low, the LCD screen displays a message when you copy or
print. Press
Setup, select Maintenance, then press OK. Press u or d to select
Change Ink Cartridge, then press OK.
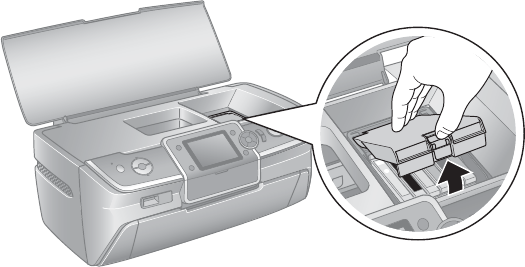
3. Open the printer cover, then open the cartridge cover.
Caution:
Never attempt to open the cartridge cover while the print head is moving. Wait until
the cartridges have moved to the replacement position.
