


10 EN
1
R
W
Z
D
G
S
F
D
S
R
E
I
O
I
A
E
L
A
Y
E
C
D
O
S
I
L
A
T
S
T
E
M
N
F
S
E
T
M
U
M
–
H
/
E
O
R
O
M
U
T
T
M
D
N
D
O
P
I
I
4
E
E
D
M
M
E
E
E
M
R
4
EN
S
L
U
P
P
OFF
P
L
A
Y
5S
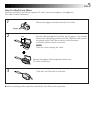
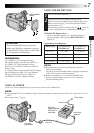
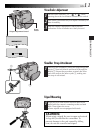
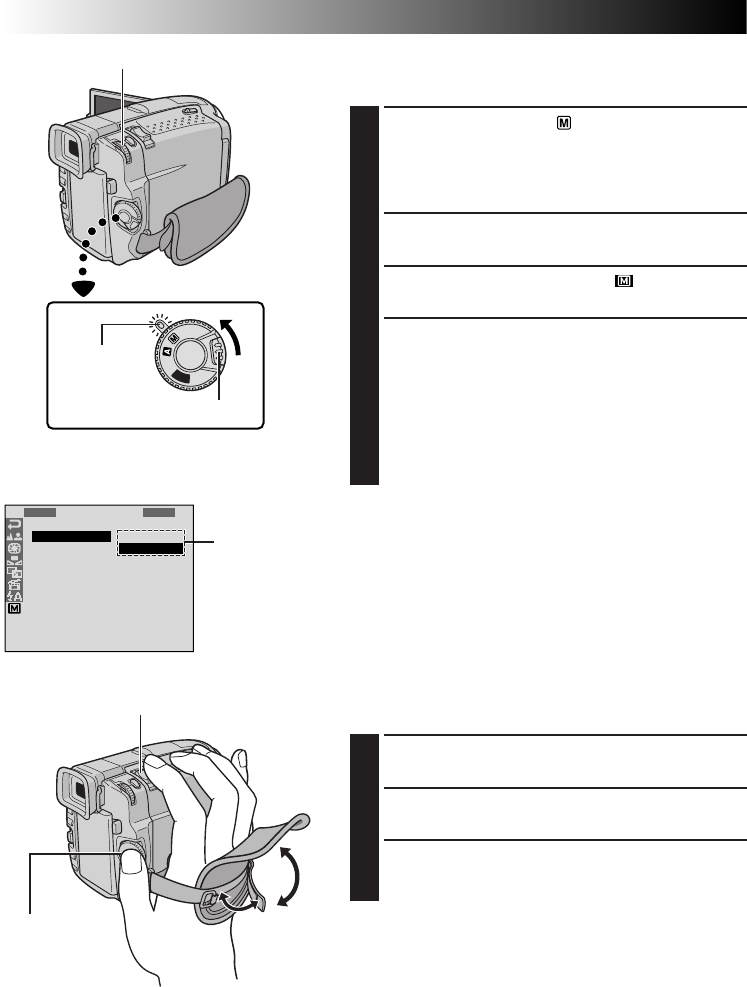
Grip Adjustment
1
Separate the Velcro strip.
2
Pass your right hand through the loop and grasp the
grip.
3
Adjust so that your thumb and fingers can easily
operate the Recording Start/Stop Button and Power
Zoom Lever. Refasten the Velcro strip.
Recording
Start/Stop
button
Power Zoom Lever
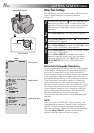
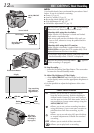
Recording Mode Setting
Set depending on your preference.
1
Set the Power Switch to “ ” or “5S” while pressing
down the Lock Button located on the switch, and
open the LCD monitor fully or pull out the viewfinder
fully. The power lamp lights and the camcorder is
turned on.
2
Press MENU/BRIGHT. The Menu Screen appears.
3
Rotate MENU/BRIGHT to select “ ” and press it.
“MODE MENU” appears.
4
Rotate MENU/BRIGHT to select “REC MODE” and
press it. The Sub Menu appears. Select “SP” or “LP”
by rotating MENU/BRIGHT and press it. When the
highlight bar is on “
1
RETURN”, press MENU/
BRIGHT twice. The Menu Screen closes.
•Audio Dubbing is impossible on a tape recorded in
the LP mode.
•“LP” (Long Play) is more economical, providing
1.5 times the recording time.
NOTES:
●
If the recording mode is switched during recording, the
playback picture will be blurred at the switching point.
●
It is recommended that tapes recorded in the LP mode
on this camcorder be played back on this camcorder.
●
During playback of a tape recorded on another
camcorder, blocks of noise may appear or there may be
momentary pauses in the sound.
Lock Button
Display
MENU/BRIGHT Dial
Power Switch
Menu Screen
GETTING STARTED
(cont.)
Sub Menu
Power lamp