


EN19
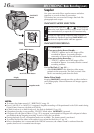
RECORDING
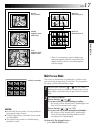
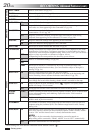
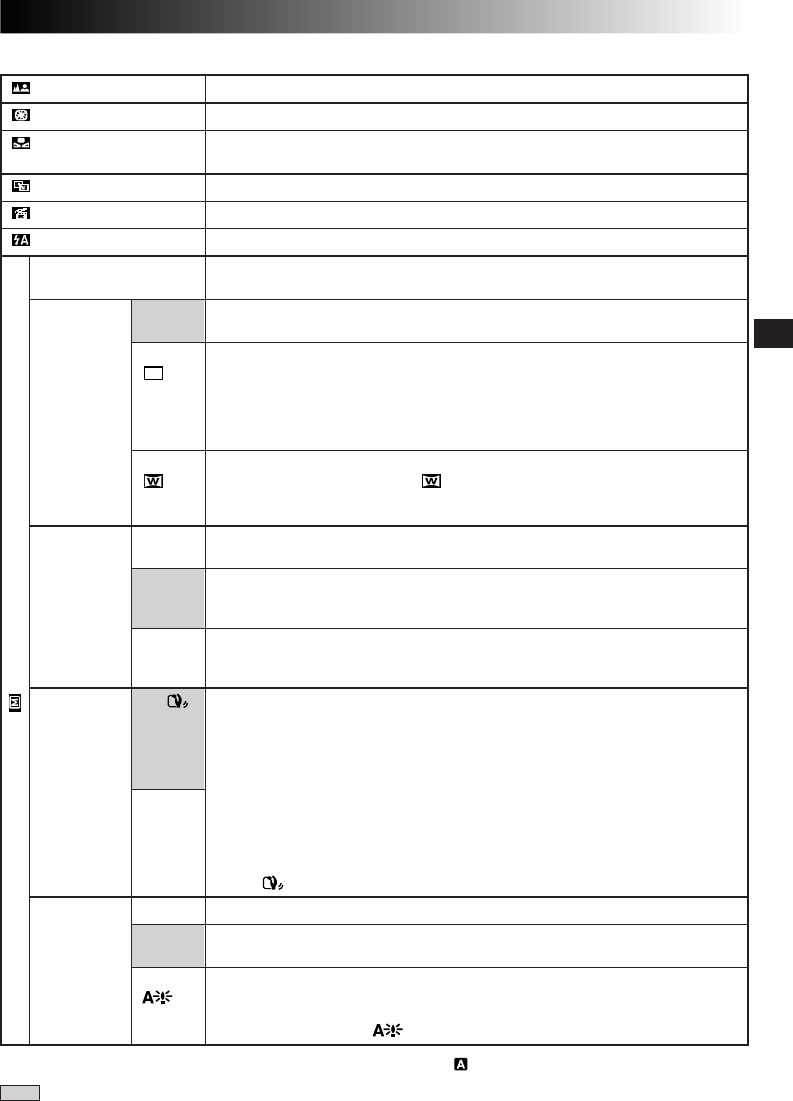
Menu Screen Explanations
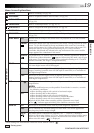
Refer to “Focusing” (੬ pg. 28).
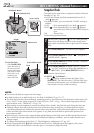
Refer to “Exposure Control” and “Iris Lock” (੬ pg. 29).
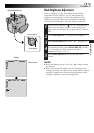
Refer to “White Balance Adjustment” and “Manual White Balance Operation”
(੬ pg. 30).
Refer to “Fade/Wipe Effects” (੬ pg. 26, 27).
Refer to “Program AE With Special Effects” (੬ pg. 25).
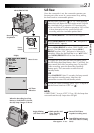
Refer to “Flash Brightness Adjustment” (੬ pg. 23).
Allows you to set the recording mode (SP or LP) depending on your preference
(੬ pg. 10).
Records with no change in the screen ratio. For playback on a TV with a normal
screen ratio.
Inserts black bands at the top and bottom of the screen. During playback on wide-
screen TVs, the black bands at the top and bottom of the screen are cut and the
screen ratio becomes 16:9. When using this mode, refer to your wide-screen TV’s
instruction manual. During playback/recording on 4:3 TVs/LCD monitor/
viewfinder, black bands are inserted at the top and bottom of the screen and the
image appears like a letterboxed 16:9 movie.
For playback on TVs with an aspect ratio of 16:9. Naturally expands the image to
fit the screen without distortion. appears. When using this mode, refer to your
wide-screen TV’s instruction manual. During playback/recording on 4:3 TVs/LCD
monitor/viewfinder, the image is elongated vertically.
When set to “10X” while using digital zoom, the zoom magnification will reset to
10X since digital zoom will be disengaged.
Allows you to use the Digital Zoom. By digitally processing and magnifying
images, zooming is possible from 10X (the optical zoom limit), to a maximum of
40X digital magnification.
Allows you to use the Digital Zoom. By digitally processing and magnifying
images, zooming is possible from 10X (the optical zoom limit), to a maximum of
100X digital magnification.
To compensate for unstable images caused by camera-shake, particularly at high
magnification.
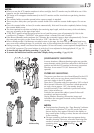
NOTES:
● Accurate stabilisation may not be possible if hand shake is excessive, or under
the following conditions:
•When shooting subjects with vertical or horizontal stripes.
•When shooting dark or dim subjects.
•When shooting subjects with excessive backlighting.
•When shooting scenes with movement in various directions.
•When shooting scenes with low-contrast backgrounds.
● Switch off this mode when recording with the camcorder on a tripod.
● The “ ” indicator appears blinking if the Stabilizer cannot be used.
Allows you to shoot dark scenes with no picture brightness adjustment.
This is automatically activated during Full Auto mode. The overall appearance
may be grainy, but the image is bright.
The shutter speed is automatically adjusted (1/25 — 1/200 sec.). Shooting a
subject in low or poor lighting at 1/25 sec. shutter speed provides a brighter image
than in the AGC mode, but the subject’s movements are not smooth or natural.
When set to this mode, “ ” is displayed.
FOCUS
EXPOSURE
W.BALANCE
FADER/WIPE
P.AE/EFFECT
FLASH ADJ.
REC MODE*
WIDE MODE OFF
CINEMA
SQUEEZE
ZOOM 10X
40X
100X
DIS ON
OFF
GAIN UP OFF
AGC
AUTO
: Factory-preset
MODE MENU
CONTINUED ON NEXT PAGE
* Menu settings are also effective when the Power Switch is set to “ ”.