


54 EN
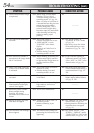
SYMPTOM POSSIBLE CAUSES CORRECTIVE ACTION
21.
Scene transition does not go
as expected.
22.
The Video Echo mode does
not work.
23.
Even when Slow Shutter is
not selected, the image looks
like it is activated.
24.
There is no strobe when the
Classic Film or Strobe mode
is activated.
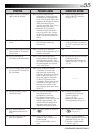
25.
White Balance cannot be
activated.
26.
When shooting a subject
illuminated by bright light,
vertical lines appear.
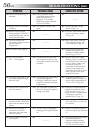
27.
When the screen is under
direct sunlight during
shooting, the screen
becomes red or black for an
instant.
28.
During recording, the date/
time does not appear.
29.
The indicators and messages
do not appear.
21.
•When using “Picture Wipe/
Dissolve” (੬ pg. 26) or
“Dissolve during 5-second
recording mode” (੬ pg. 24),
there is a delay of a fraction of
a second between the previous
record stop-point and the
Dissolve start-point. This is
normal, but this slight delay
becomes especially noticeable
when shooting fast-moving
subject or during rapid
panning.
22.
•The Picture Wipe or
Dissolve functions are in use.
•“WIDE MODE” is set to
“SQUEEZE” in the Menu
Screen.
•A Fade-In or Fade-Out is in
progress.
•Dissolve during 5-second
recording mode is in use.
23.
•When shooting in the dark, the
unit becomes highly sensitive
to light and the image takes on
an effect similar to Slow
Shutter.
24.
•The Picture Wipe or Dissolve
function is in use.
•Dissolve during 5-second
recording mode is in use.
25.
•The Sepia or Monotone mode
is activated.
26.
•This is a result of exceedingly
high contrast, and is not a
malfunction.
27.
•This is not a malfunction.
28.
•“DISPLAY” is set to “OFF” in
the Menu Screen.
•Interface Shooting is per-
formed.
29.
•The Menu Screen settings are
preventing the indications from
appearing.
21.
————
22.
•Set “WIDE MODE” to
“CINEMA” or “OFF” mode
(੬ pg. 19).
•Do not try to use the Video
Echo mode during a scene
transition (੬ pg. 24 – 26).
23.
•If you want the lighting to
look more natural, set GAIN
UP to “AGC” or “OFF” in the
Menu Screen (੬ pg. 19).
24.
•Do not try to use the Classic
Film or Strobe mode during a
scene transition (੬ pg. 24 –
26).
25.
•Turn off Sepia or Monotone
before setting White Balance
(੬ pg. 25, 30).
26.
————
27.
————
28.
•Set “DISPLAY” to “ON” in the
Menu Screen (੬ pg. 20).
•During Interface Shooting, the
date/time does not appear
(੬ pg. 13).
29.
•Set “INDICATION”, “ON
SCREEN”, “DISPLAY” and/or
“TIME CODE” to “ON” in the
Menu Screen (੬ pg. 20, 32).
TROUBLESHOOTING
(cont.)