


1-16
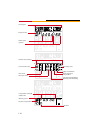
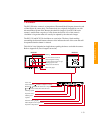
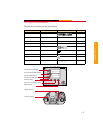
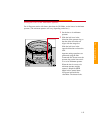
MENU Button
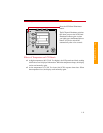
✔ Press and release the button to turn the Image LCD panel On or Off. Refer to
“Image LCD Panel” on page 1-8.
☛ The Image LCD panel may illuminate unevenly after you insert a new battery or first
turn the camera On. You can correct the problem by turning the Image LCD panel
Off, then back On.
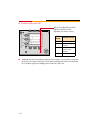
✔ Press and hold the button and rotate the Main-Command dial to scroll through the
Menu bar icons at the top of the Image LCD panel.
✔ Press and release to exit menus.
✔ Press this button and the SELECT button simultaneously to delete the currently
selected image. Refer to “Deleting One Image” on page 9-12.
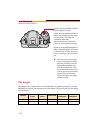
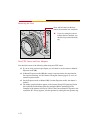
SELECT Button
✔ Press and hold the button and rotate the Main-Command dial to scroll through
images or menu options. Release it to select the desired image or menu option.
✔ Press this button and the MENU button simultaneously to delete the current image.
✔ Press and release to display the Histogram and Image information. Refer to
“Viewing Overexposure Areas and Histogram Information” on page 9-5.
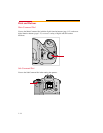
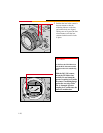
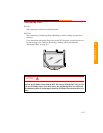
REC/TAG Button
✔ Press and quickly release the button to tag (or untag) the currently selected image.
You can tag images that you do not want deleted. Refer to “Tagging an Image” on
page 9-9. You can also tag images that you want to group for operations available
in the Kodak Software. Refer to the KODAK PROFESSIONAL DCS Host
Software User’s manual on the included DCS Host Software CD.
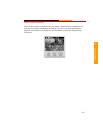
✔ Press and hold the button, wait for the Currently Recording icon to appear on the
Status screen of the Image LCD panel or the PC Card Busy/Record icon to turn
green. Speak into the microphone to record a sound file. Refer to “Associating
Sound Files With Images” on page 9-10.