


69
5
Chapter 5 Preparation (continued)
Adjusting the Lens White Shading
Take the following steps to adjust the white shading:
<Note>
Vertical coloring may occur near the open position of the
lens iris, even after adjusting the white shading. This
phenomenon, however, is a characteristic of the lens or
optical system. It does not indicate a malfunction.
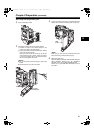
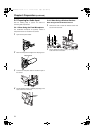
1 Mount the lens on the camera.
Be sure to connect the lens cable.
2 Set the electronic shutter to [OFF], the gain to [L (0dB)],
and the ASPECT option to “16:9”. Select the ASPECT
option from the SYSTEM MODE screen on the
SYSTEM SETTING page.
3 If the lens has an extender, disable the extender
feature.
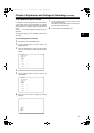
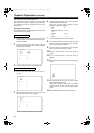
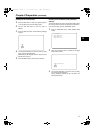
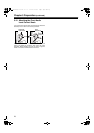
4 Operate the MENU and go to the PAINT page to open
the <GAMMA> screen. Confirm that the GAMMA
MODE SEL is set to STD. From the VF page, open the
<VF DISPLAY> screen to confirm that ZEBRA1
DETECT, ZEBRA2 DETECT, and ZEBRA2 are set as
shown in the diagram below. If they are not, correct the
settings and then close the MENU screen.
5 Set the Viewfinder ZEBRA switch to ON.
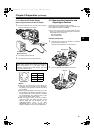
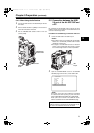
6 Aim the lens at a sheet of white paper that has no color
shading.
<Note>
Flickering naturally occurs when fluorescent, mercury
or other such lamps are used for lighting. Therefore,
use a light source that does not flicker, such as sunlight
or halogen lamps.
7 Set the lens iris to manual and adjust the lens iris so
that the ZEBRA pattern covers the entire screen.
Make sure that the lens iris is set between F4 and F11.
<Notes>
z The ZEBRA pattern will not cover the entire screen if
the lighting is uneven. In this case, adjust the lighting
(e.g., change the position of the light source).
z Even if the lens iris is not set between F4 and F11,
adjust the lighting (e.g., change the position of the
light source).
z Make sure that the electronic shutter is set to OFF.
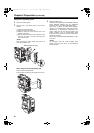
8 Set the WHITE BAL selector switch to A or B, and
execute Auto White Balance (AWB) with the AUTO
W/B BAL switch.
Next, execute Auto Black Balance (ABB) with the
AUTO W/B BAL switch.
Repeat Auto White Balance (ABB) with the AUTO W/
B BAL switch.
9 Repeat the adjustment described in Step 7.
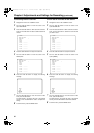
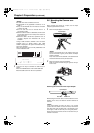
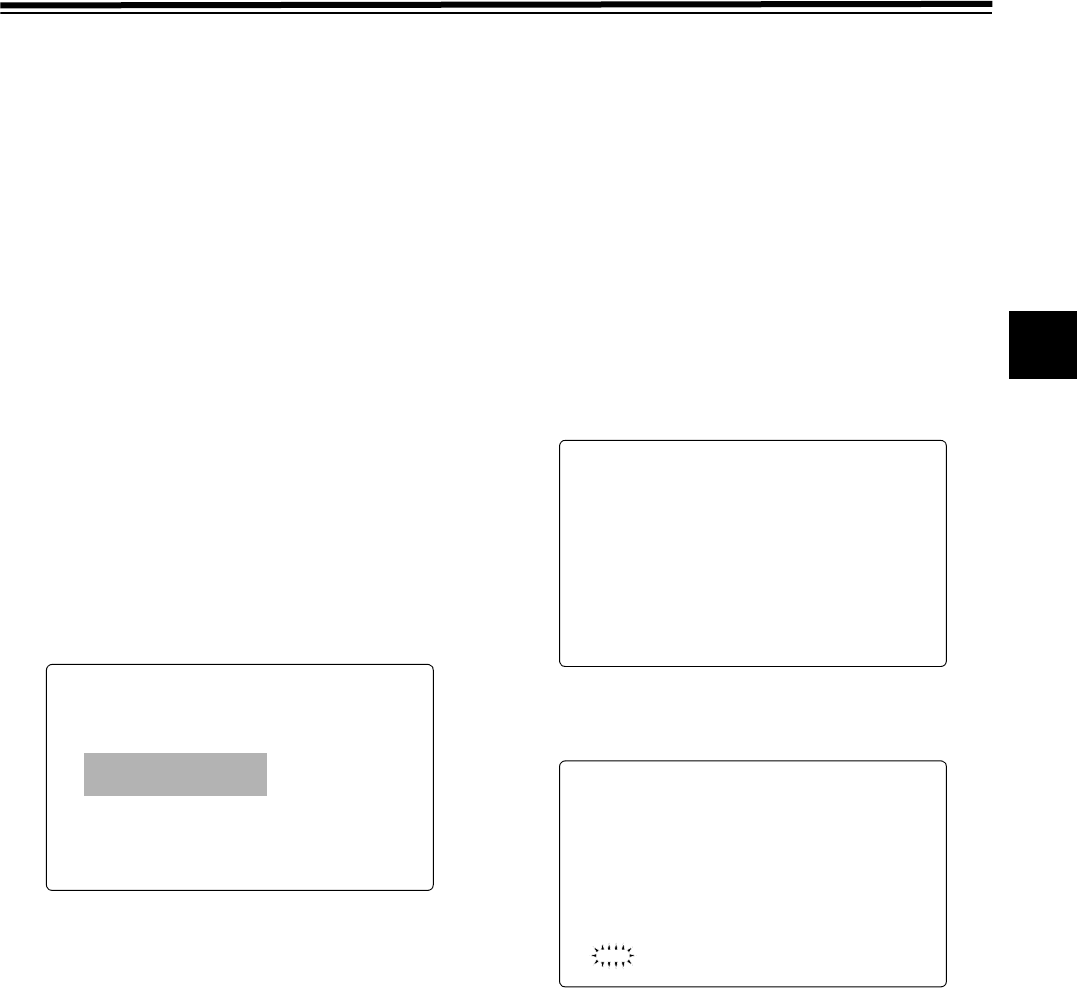
10 Activate the MENU and go to the MAINTENANCE page
to open the <WHITE SHADING> screen.
11 Turn the JOG Dial button to move the cursor to
DETECTION (V.SAW). Then, press the JOG Dial
button to execute white shading compensation.
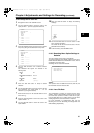
12 Press the JOG Dial button and the following message
appears.
13 Turn the JOG Dial button to move the cursor to [YES].
Then press the JOG Dial button.
[ACTIVE] appears on the screen to indicate that the
white shading automatic adjustment is running.
[W-SHD OK] appears when the adjustment is
completed.
<Note>
This compensation may not be possible when [LEVEL
OVER] is displayed, depending on the KNEE setting. In
this case, first narrow the lens iris or set the OUTPUT
switch AUTO KNEE to OFF. Next, activate the MENU to
open the PAINT screen. From the PAINT screen, open
the <KNEE/LEVEL> screen and set MANUAL KNEE to
OFF. Then repeat Steps
4 to 9.
After [W-SHD OK] is displayed, re-set MANUAL KNEE
back to ON.
14 If the lens has an extender or a ratio converter, enable
the feature and repeat Steps
7 to 13 for each feature.
Three patterns of compensation values (with an extender,
with a ratio converter, and without any features) will be
stored as one set of lens file data in the camera-recorder.
9)',63/$<!
',63&21',7,211250$/
',6302'(
9)287<
9)'7/
=(%5$'(7(&7
=(%5$'(7(&7
=(%5$6327
/2:/,*+7/9/
(&80(18',632))
0,1',&$7252))
0$5.(5&+$5/9/
:+,7(6+$',1*!
&255(&721
'(7(&7,2196$:
'(7(&7"
<(6
12
#,52%2'PINKUJDQQMࡍࠫ㧞㧜㧜㧡ᐕ㧝㧞㧤ᣣޓᧁᦐᣣޓඦᓟ㧝㧞ᤨ㧠㧥ಽ