


87
6
Chapter 6 Manuipulating Clips with Thumbnails (continued)
6-16 Setting the Thumbnail Display
Mode
The thumbnail display mode can be customised to suit your
preferences.
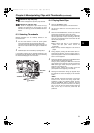
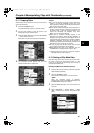
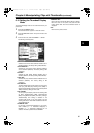
1 Press the THUMBNAIL button.
The thumbnail screen appears on the LCD monitor.
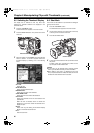
2 Press the MENU BAR button. The pointer moves to the
menu bar.
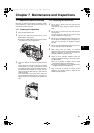
3 From the menu bar, select THUMBNAIL SETUP.
The following screen appears.
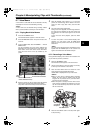
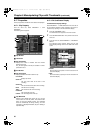
MARKER IND. :
Switches the shot mark marker between indication and no
indication (ON/OFF). The factory setting is ON (indication).
VOICE MEMO IND. :
Switches the voice memo marker between indication
and no indication (ON/OFF). The factory setting is ON
(indication).
WIDE IND. :
Switches the wide marker between indication and no
indication (ON/OFF). The factory setting is ON (indication).
PROXY IND. :
Switches the proxy indicator between indication and no
indication (ON/OFF). The factory setting is ON
(indication).
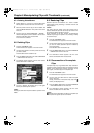
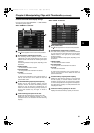
DATA DISPLAY:
The time display field of the clip offers a choice of Time
Code (TC), User Bits (UB), Shooting Time (TIME) or
Shooting Date (DATE) Shooting Time and Date (DATE
TIME). The factory setting is Time Code.
DATE FORMAT:
You can specify the display order for the shooting date
as either Year/Month/Day (YMD), Month/Day/Year
(MDY) or Day/Month/Year (DMY). The factory setting is
Year/Month/Day. This setting is reflected in the
recording date shown in the clip property and the
shooting date shown when DATE is selected under the
item DATA DISPLAY.
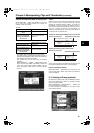
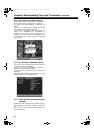
THUMBNAIL SIZE:
For the size of thumbnails displayed on one screen,
either LARGE (3 C 2 thumbnails displayed) or
NORMAL (4 C 3 thumbnails displayed) can be
selected. The factory default value is NORMAL.
THUMBNAIL INIT:
Return the above thumbnail display settings to default.
Move the cursor to this option, and press the SET
button. Select “YES” when the confirmation screen is
displayed.
EXIT:
Returns to the previous menu.
#,52%2'PINKUJDQQMࡍࠫ㧞㧜㧜㧡ᐕ㧝㧞㧤ᣣޓᧁᦐᣣޓඦᓟ㧝㧞ᤨ㧠㧥ಽ