Edit mode
50
LSQT1091
ª Before recording with audio dubbing
≥Set to Tape Recording Mode.
≥When you want to preserve the original sound
taken during recording, set [ADVANCED] >>
[AUDIO REC] >> [12bit] to take pictures. (When
set [16bit], the sounds taken during recording
are erased after recording with audio dubbing.)
≥Set [BASIC] >> [REC SPEED] >> [SP] to take
pictures.
ª
To play back the sound recorded with
audio dubbing
You can switch between the sound recorded with
audio dubbing and the original sound.
Set [SETUP] >> [12bit AUDIO] >> [ST2] or [MIX].
[ST1]: It only plays back the original sound.
[ST2]: It only plays back the sound added by
audio dubbing.
[MIX]: It simultaneously plays back the original
sound and the sound added with audio
dubbing.
≥During audio dubbing, it is automatically set to
[ST2].
PC Connection With DV Interface
Cable
A video clip can be transferred directly to your PC
(personal computer) via a DV Interface Cable
(optional) using products and software from a
number of video editing software companies.
Using products from video editing software
companies allows you to capture and edit video
clips using the DV Interface.
Panasonic DVC are OHCI compliant and
should have no problem working with any
OHCI compliant FireWire Card/Video —
Editing software package.
≥Personal computer must be equipped with a DV
Terminal.
≥During Camcorder playback, do not disconnect
the DV Interface Cable or turn the Camcorder
off as this may cause a PC hang-up error.
≥IEEE1394 Interface must conform to OHCI
(Open Host Controller Interface Specification).
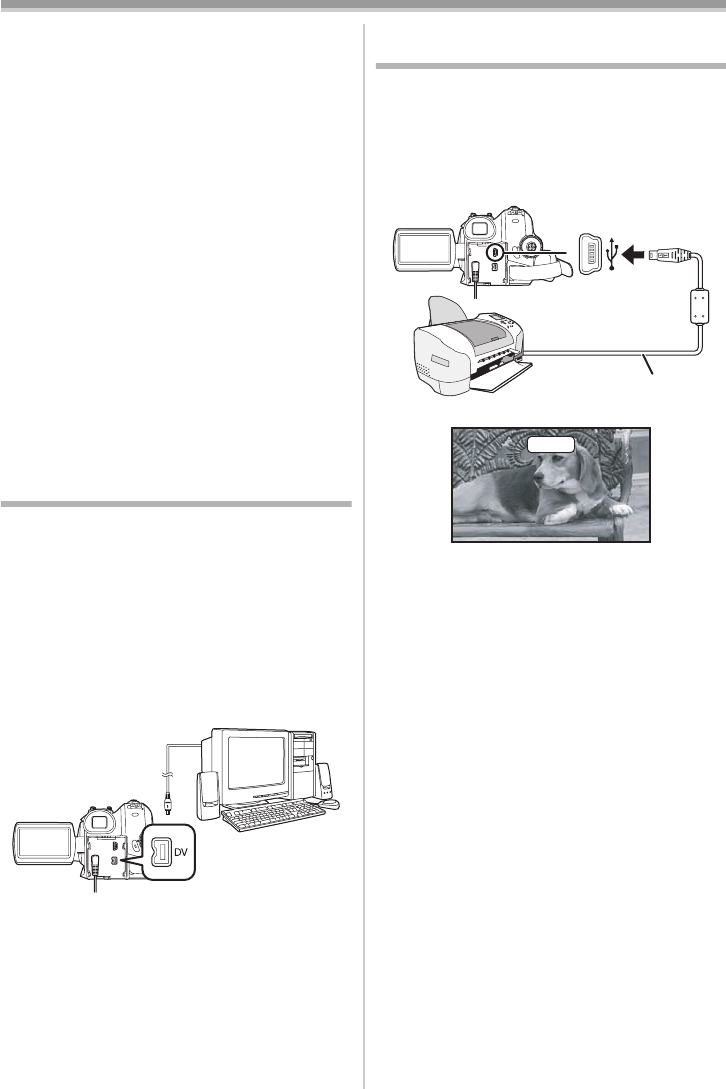
Printing pictures by directly
connecting to the printer (PictBridge)
To print pictures by directly connecting the
Camcorder to the printer, use a printer compatible
with PictBridge. (Read the operating instructions
for the printer.)
≥Insert a card and set to Card Playback Mode.
1 Connect the Camcorder and the printer with
the supplied USB cable.
1 USB cable
≥The [PictBridge] indication appears on the
screen of the Camcorder. (When the printer is
being recognized, the [PictBridge] indication
blinks.)
≥When no card is inserted in the Camcorder, the
[PictBridge] indication does not appear. (You
cannot print any pictures.)
≥When the Camcorder and the printer are not
connected properly, the [PictBridge] indication
keeps blinking. (It will blink for over approx.
1 minute.) Connect the cable or check the
printer.
≥When images are displayed in multi-screen,
they cannot be printed.
2 Select [SINGLE PRINT] or [DPOF PRINT].
≥If there is no file with a DPOF setting, you
cannot select [DPOF PRINT].
≥When you select [DPOF PRINT] for printing,
set the number of prints in DPOF setting.
≥When [DPOF PRINT] is selected, print after
you determine the paper size. (Step 6)
≥When [DPOF PRINT] is selected, date
printing is unavailable.
1
PictBridge
LSQT1091_ENG.book 50 ページ 2006年11月27日 月曜日 午後1時17分


