Edit mode
51
LSQT1091
3 Move the joystick left and right to select a
desired picture and then press it.
4 Select the desired number of prints.
≥You can set up to 9 prints.
5 Select the setting for date printing.
≥If the printer is not capable of date printing,
this setting is unavailable.
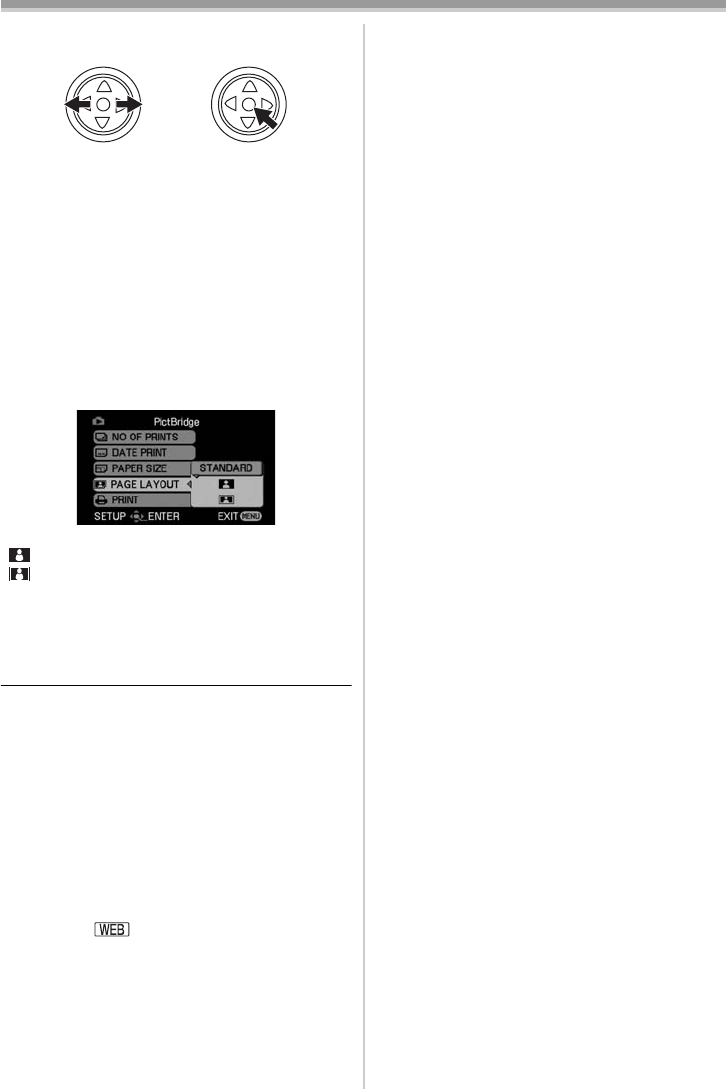
6 Select [PAPER SIZE].
[STANDARD]: Size specific to the printer
[4a5 INCH]
[5a7 INCH]
[4a6 INCH]
[A4]
≥You cannot set paper sizes not supported by
the printer.
7 Select [PAGE LAYOUT].
[STANDARD]: Layout set on the printer
[]: No frame
[]: With frame
≥You cannot set a layout not supported by the
printer.
8 Set [PRINT] >> [YES] to start printing.
ª
When you stop printing halfway
Move the joystick down.
≥Avoid the following operations during printing.
These operations disable proper printing.
≥Disconnecting the USB cable
≥Removing the card
≥Switching the mode dial
≥Turning off the power
≥Check the settings for the paper size, quality of
print, etc. on the printer.
≥Still pictures recorded on other equipment may
not be printed.
≥When the Camcorder and the printer are
connected in the Tape Recording/Playback
Mode, the [ ] Indication may appear on the
LCD monitor. However, pictures cannot be
printed.
≥The sides of pictures recorded when [16:9] is
set may be cut at printing. (When you purchase
this unit, [ASPECT] is set to [16:9].) When using
a printer with a trimming or borderless function,
cancel this setting. (Refer to the operating
instructions of the printer for details.)
≥If your photos are sent to a professional photo
printing service, please request that they are
printed in their original aspect ratio.
≥Connect the printer directly to this unit. Do not
use a USB hub.
LSQT1091_ENG.book 51 ページ 2006年11月27日 月曜日 午後1時17分


