Hollywood DV-Bridge User’s Guide • Using Hollywood DV-Bridge Without a Computer • Page 58
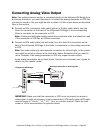
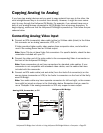
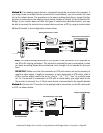
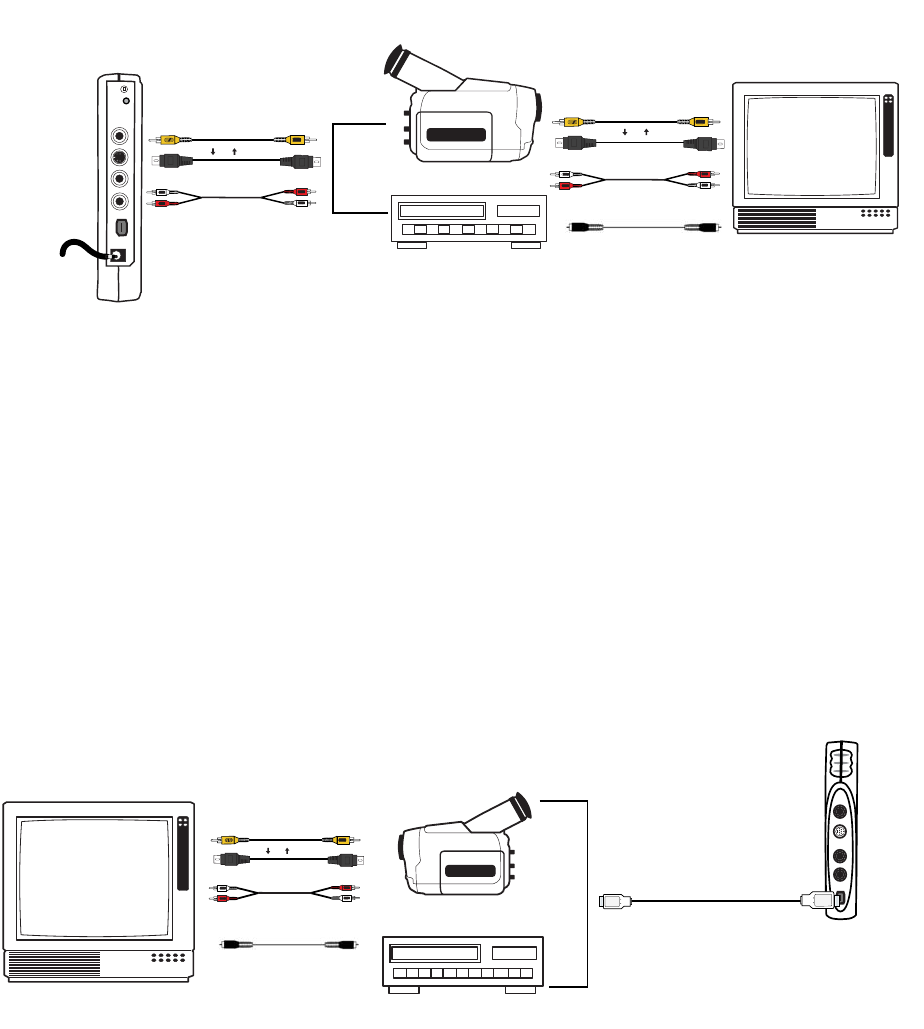
Method B: If an analog output device is connected during the conversion (for example, if
you always leave an output device connected for convenience), you can connect the mon-
itor to the output device. The procedure is the same as described above, except that the
monitor is connected to the analog output device instead of directly to the Hollywood DV-
Bridge. If your monitor does not have the types of connections described above, you may
be able to connect the monitor to an output device such as a VCR by using a coaxial cable.
Method B results in the configuration shown below.
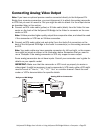
Note: The output analog camcorder or VCR shown in the illustration is not required for
the DV-to-DV copying procedure. This method is provided for your convenience in case
you have an analog output device attached, even though it is not needed for this pro-
cess.
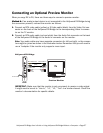
IMPORTANT: Make sure that the camcorder or VCR and monitor are set up properly to
receive a video signal. It might be necessary to set a camcorder to VTR mode, while a
VCR or monitor might need to be set to “Line In,” “L1,” “L2,” “Aux” or a similar chan-
nel. Or, if a monitor is connected to a VCR with a coaxial cable, you might need to set
the monitor to channel 3 or 4. Check each device’s documentation for specific details.
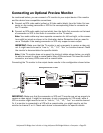
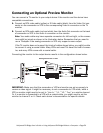
Method C: Connect the TV monitor to the analog output connectors on the DV camcorder
or VCR, as shown below.
Analog Camcorder or VCR
Audio Out
Audio In
RCA Video Out
RCA Video In
S-Video Out
S-Video In
Back
Or
(To AC Power)
TV
VHS
Audio Out
Audio In
RCA Video Out
RCA Video In
S-Video Out
S-Video In
Or
Coaxial Out Coaxial In
OR
Optional Preview Monitor
Hollywood DV-Bridge
DV Camcorder or DV VCR
VHS
DV OutDV In
Front
TV
Optional
Preview Monitor
Audio In
Audio Out
RCA Video In RCA Video Out
S-Video In
S-Video Out
Or
Coaxial In
Coaxial Out
OR


