


75
Various Shooting Functions
1
Assigning the Fn (Function) button to [JPEG>RAW] (GP.164)
and then pressing the Fn button when a [Pic Quality/Size] setting
other than a RAW setting is selected (GP.91) allows you to switch
to RAW mode with the same image ratio. Pressing the Fn button
again returns to JPEG mode.
1
Set [Function Button] to [JPEG>RAW] on the setup
menu.
• For the operating procedure, see P.164.
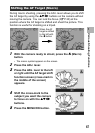
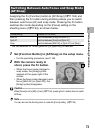
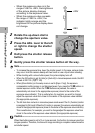
2
With the camera ready to shoot, press the Fn button.
• The camera switches to RAW mode
with the same image ratio and [RAW]
is displayed in orange on the screen.
• Pressing the Fn button again returns
to JPEG mode.
Caution------------------------------------------------------------------------------------------
Pressing the Fn button does not switch to JPEG mode in the following cases.
• [Pic Quality/Size] is set to RAW mode (GP.91)
• [Continuous Mode] is set to a setting other than [Off] (GP.99)
• [Auto Bracket] is set to a setting other than [Off] (GP.110)
Note----------------------------------------------------------------------------------------------
• Turning the camera off or changing the [Function Button] setting after switching to
RAW mode returns the setting to JPEG mode.
• When shooting in RAW mode, see the notes on P.92.
•
You can also use the shooting menu to switch between JPEG and RAW mode. (
G
P.91)
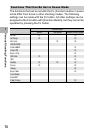
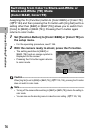
Switching from JPEG to RAW Mode
(JPEG>RAW)
[Pic Quality/Size] setting Pressing the Fn button
F3648(10M)/N3648(10M)/N3264(8M)/
N2592(5M)/N2048(3M)/N1280(1M)/N640 (VGA)
Switches between RAW(10M) and the
original [Pic Quality/Size] setting
F3:2(9M)/N3:2(9M) Switches between RAW3:2(9M) and the
original [Pic Quality/Size] setting
F1:1(7M)/N1:1(7M) Switches between RAW1:1(7M) and the
original [Pic Quality/Size] setting
RAW(10M)/RAW3:2(9M)/RAW1:1(7M) Does not operate