


✤ L’option INSCRIPTION <IMPRINT> vous permet d’inscrire la
date sur une photo. Votre appareil photo est doté d’une horloge
interne qui affiche la date et l’heure au format 24 h. L’horloge de
l’appareil photo doit être réglée si vous avez l’intention d’inscrire
la date et l’heure sur votre photo.
Avant de commencer
✤ Réglez l’HORLOGE (reportez-vous à la page précédente).
1. Allumez votre appareil photo en plaçant le sélecteur de mise sous
tension sur le mode (APPAREIL PHOTO <CAMERA>).
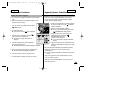
2. Appuyez sur le bouton MENU <MENU>.
■
Le menu principal dans lequel apparaît l’option
(PARAMETRAGE <SET>) s’affiche.
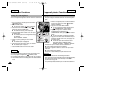
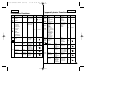
3. Appuyez sur la gauche ou la droite du bouton multidirectionnel
pour sélectionner (PARAMETRAGE <SET>) puis appuyez
sur le bas du bouton.
■
Le menu secondaire où apparaît «INSCRIPTION»
<IMPRINT> s’affiche.
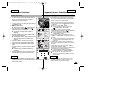
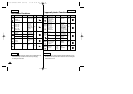
4. Appuyez sur le bas du bouton multidirectionnel pour
sélectionner «INSCRIPTION» <IMPRINT> puis appuyez sur la
droite du bouton.
■
Les options DESACTIVEE <OFF>, DATE et
DATE&HEURE s’affichent.
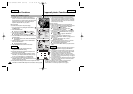
5. Sélectionnez une option en appuyant le bas ou sur le haut du
bouton multidirectionnel puis appuyez sur OK <OK>.
■
L’option sélectionnée devient effective.
6. Appuyez sur le bouton MENU <MENU> pour quitter l’écran du
menu.
Remarques
✤ Chaque image possède des informations relatives à la date et
à l’heure, indépendamment du réglage de INSCRIPTION
<IMPRINT>.
✤ Une fois que les informations relatives à la date et à l’heure ont
été attribuées à une image, elle ne peuvent plus être modifiées.
✤ Il arrive que l’écran LCD n’affiche pas la totalité des
informations relatives à l’inscription, mais ces informations
apparaissent entièrement lorsque vous effectuez une copie sur
un ordinateur ou lorsque vous imprimez l’image. Il ne s’agit pas
d’un dysfonctionnement.
✤ Si vous retirez les piles de l’appareil photo pendant une période
prolongée ou si les piles sont usées, il vous faudra peut-être
régler à nouveau l’horloge.
✤ L’horloge en mode Camera <Photo> fait l’objet d’un réglage particulier.
Pour davantage d’informations sur le réglage DATE&HEURE
<DATE & TIME> sur le caméscope, reportez-vous à la page 38.
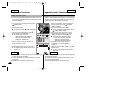
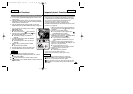
Réglage de l’option INSCRIPTION <IMPRINT>
L’appareil photo: Fonctions
ENGLISH FRANÇAIS
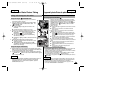
✤ IMPRINT allows the user to place a date stamp on a
picture. Your camera has a built-in clock that maintains
the date and time in a 24-hour format. The camera clock
needs to be set if you plan to use the date stamp to
imprint the date and time on your picture.
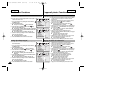
Before you begin!
✤ Set the CLOCK (refer to the previous page).
1. Turn your Camera on by setting the Power Switch to
(CAMERA) mode.
2. Press the MENU button.
■ The top menu including (SET) is displayed.
3. Press the LEFT or RIGHT button to select (SET),
then press the DOWN button.
■ The submenu including “IMPRINT” is displayed.
4. Press the DOWN button to select “IMPRINT”, then press
the RIGHT button.
■ The available options: OFF, DATE and DATE&TIME
are displayed.
5. Select an option by pressing the UP or DOWN button,
then press the OK button.
■ The selected option is applied.
6. Press the MENU button to exit the menu screen.
✤ Every image has its date and time information,
regardless of the IMPRINT setting.
✤ Once the date and time information is stamped on the
image then it is not removable.
✤ The LCD monitor may not display full length of imprint
information, you will see full information when you copy
to a PC or print the image. It is not malfunctioning.
✤ If you remove the batteries from the camera for an
extended period of time, or the batteries become run out,
you may need to reset the clock.
✤ A separate clock setting for Camera mode is required. For further
information on DATE & TIME setup for the Camcorder, refer to page 38.
9292
The Camera: Functions
Setting the IMPRINT Option
Notes
EXIT:OK
MOVE:
RESET
ENGLISH
NO
NORMAL
COMPUTER
BACK: SET:OK
00779C SCD6050 UK+FR (60-123) 7/1/04 12:47 PM Page 92