


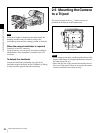

24
Preparing the Power Supply
Chapter 2 Installation and Preparations
2-7 Preparing the Power
Supply
This camera operates on DC 12 V (10.5 to 17 V).
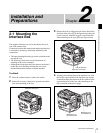
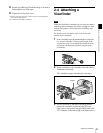
Supplying power directly to the camera
head
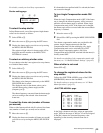
Connect a power supply to the DC IN connector of the
camera head.
Use a commercially available shielded cable by attaching
the supplied 8-pin connector for a power cable.
For details on the connection, consult your local Sony
representative.
To turn on the camera
Set the CAM POWER switch of the camera head to the ON
side, and the camera is turned on.
Power is also supplied to the viewfinder and lens mounted
on the camera head.
Power of 12 V or 24 V can be fed to accessories via the DC
OUT connectors.
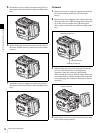
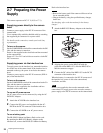
Supplying power via the interface box
To supply power via the interface box, mount the interface
box to the rear of the camera head. If the interface box is
mounted on the top, the power is not fed to the camera
head.
Connect a power supply to the DC IN connector (XLR 4-
pin) of the interface box.
To turn on the camera
Set the CAM POWER switch of the camera head to the CA
side, and the camera is turned on.
The power is also supplied to the viewfinder and lens
mounted on the camera head.
To use an AC power source
An AC power source can be connected, by using the AC-
DN2B AC Adaptor.
1
Attach the AC-DN2B to the interface box.
2
Connect the DC power cord supplied with the AC-
DN2B to the DC IN connector of the interface box.
3
Connect the AC-DN2B to an AC power source.
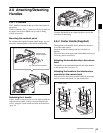
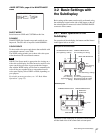
To use a battery pack
The BP-GL95 Lithium-ion Battery Pack can be used.
By attaching the BKP-L551 Battery Adaptor to the
interface box, connect the BP-GL95 Lithium-ion Battery
Pack to the interface box.
• Remove the battery pack if the camera will be out of use
for an extended period.
• Charge the battery, using the specified battery charger,
before use.
For charging, refer to the instructions for the battery
charger.
1
Attach the BKP-L551 Battery Adaptor to the interface
box.
2
Aligning the groove on the BP-GL95 with the
projection on the BKP-L551, slide the BP-GL95 so
that the connectors engage.
3
Connect the DC cable of the BKP-L551 to the DC IN
connector of the interface box.
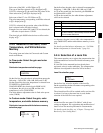
When the battery is connected to the DC IN connector of
the interface box, power is fed to the camera head,
viewfinder, and lens.
Power is not supplied to the recorder mounted on the
camera head. To supply power to the recorder, connect a
power supply to the DC IN connector on the camera head.
Notes
Note
D
C
IN
1
0
.5
V
-1
7
V
LO
C
K
BKP-L551
Interface box