


28
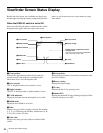
Menu Operations
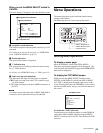
Editing the USER Menu
You can select desired pages and items from the
OPERATION, PAINT, MAINTENANCE, FILE, and
DIAGNOSIS menus and register them to the USER menu.
If you specify pages or items frequently used for the USER
menu, you can easily call and use them.
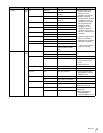
The following pages are included in the factory-set USER
menu:
For the items on each page, see the corresponding source
menu page in the table in “Menu List” (page 32).
The USER MENU CUSTOMIZE menu allows you to
configure a USER menu that consists only of pages and items
that you need by adding, deleting or replacing the pages.
Editing by items
The USER MENU CUSTOMIZE menu allows you to add
a new page to the USER menu and add desired items to the
page.
While the EDIT page contains factory-preset items, the
USER 1 EDIT to USER 19 EDIT pages are all blank in
their initial state. You can register up to 10 items, including
blank lines, on each of these pages.
To add items to a page
Proceed as follows.
1
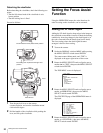
While pressing the MENU SELECT switch toward
ENTER, move the DISPLAY switch from OFF to
MENU.
The TOP MENU screen appears.
2
Turn the MENU SELECT knob to move the arrow
marker (
,) to “USER MENU CUSTOMIZE”, then
press the MENU SELECT switch toward ENTER.
If this is the first time the USER MENU CUSTOMIZE
menu has been displayed, the CONTENTS page of the
menu appears.
If the USER MENU CUSTOMIZE menu has been
used before, the last accessed page appears.
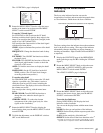
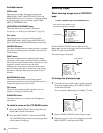
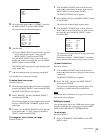
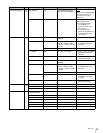
3
If the CONTENTS page is displayed, turn the MENU
SELECT knob to move the arrow marker (
,) to one
of USER 1 EDIT to USER 19 EDIT, then press the
MENU SELECT switch toward ENTER to display the
page.
If a different page is displayed, turn the MENU
SELECT knob until the desired page appears, then
press the MENU SELECT switch toward ENTER.
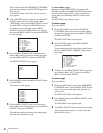
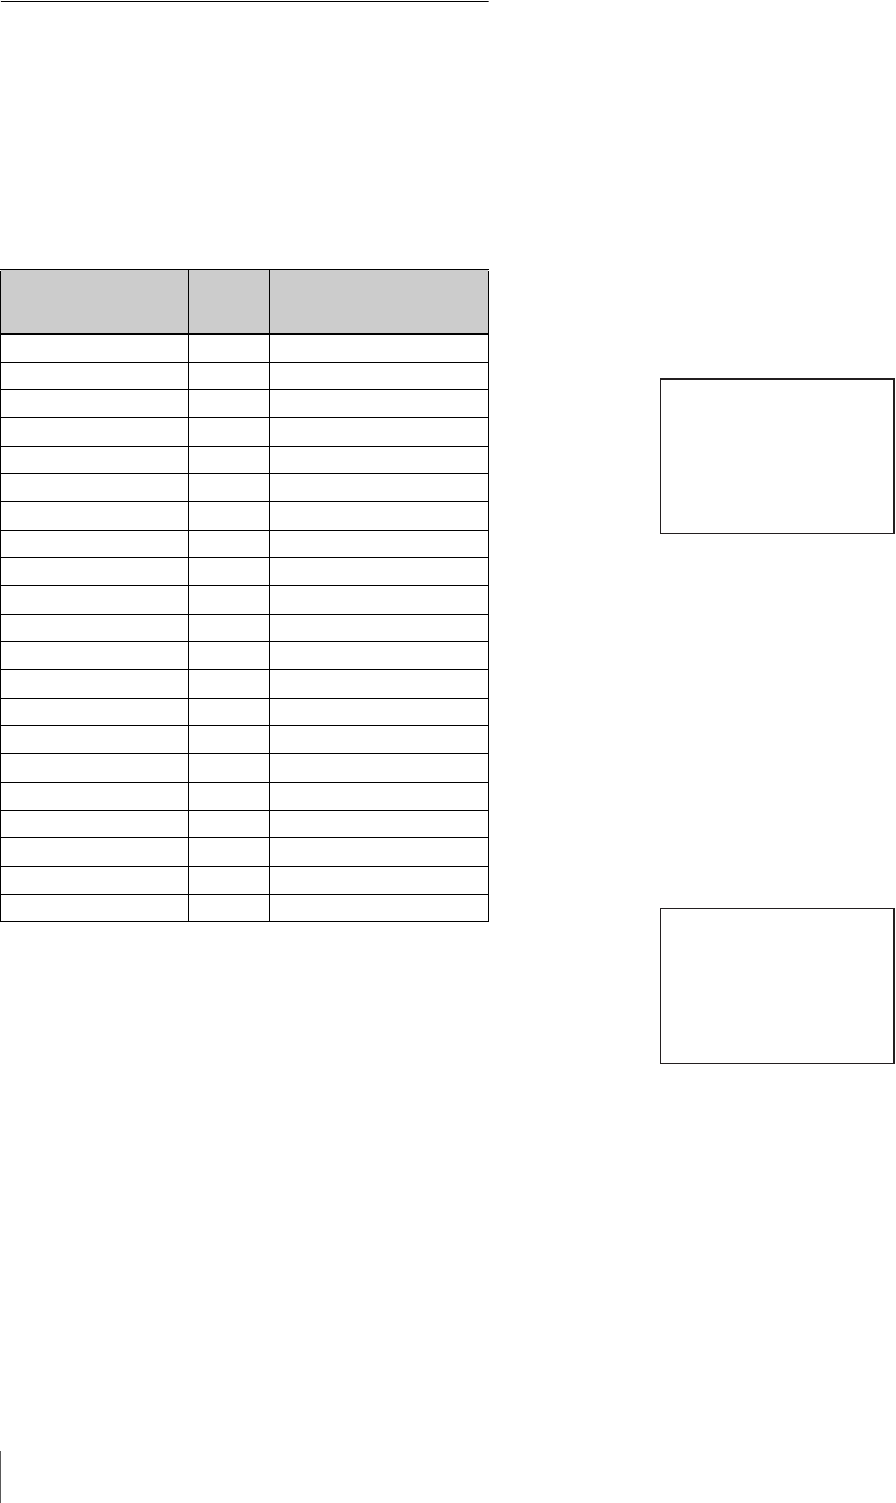
Example: When you select the USER 2 EDIT page
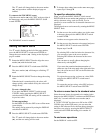
4
Move the arrow marker (,) to the item to be added
(this operation is unnecessary, if no item exists on the
page as shown in the figure for step 3), then press the
MENU SELECT switch toward ENTER.
The EDIT FUNCTION screen appears.
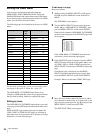
Menu page title USER
menu
No.
Source menu / page No.
<VF OUT> U01 OPERATION 08
<VF DETAIL> U02 OPERATION 04
<FOCUS ASSIST> U03 OPERATION 05
<VF DISPLAY> U04 OPERATION 01
<‘!’ IND> U05 OPERATION 02
<VF MARKER> U06 OPERATION 03
<CURSOR> U07 OPERATION 07
<ZEBRA> U08 OPERATION 06
<SWITCH ASSIGN1> U09 OPERATION 09
<POWER SAVE> U10 MAINTENANCE M13
<LENS FILE> U11 OPERATION 17
<HEAD SET> U12 OPERATION 10
<INTERCOM LEVEL> U13 OPERATION 11
<MIC GAIN> U14 MAINTENANCE M06
<OUTPUT FORMAT> U15 MAINTENANCE M09
<TEST OUT> U16 MAINTENANCE M11
<SDI-2 OUT> U17 MAINTENANCE M12
<DOWN CONVERTER> U18 MAINTENANCE M10
<TRUNK> U19 MAINTENANCE M14
<UP TALLY> U20 MAINTENANCE M07
<ROM VERSION> U21 DIAGNOSIS D04
CONTENTS E00
xx
01.EDIT PAGE
02.USER 1 EDIT
c
03.USER 2 EDIT
04.USER 3 EDIT
05.USER 4 EDIT
06.USER 5 EDIT
07.USER 6 EDIT
08.USER 7 EDIT
09.USER 8 EDIT
10.USER 9 EDIT
TOP
USER 2 EDIT E03
c
TOP